
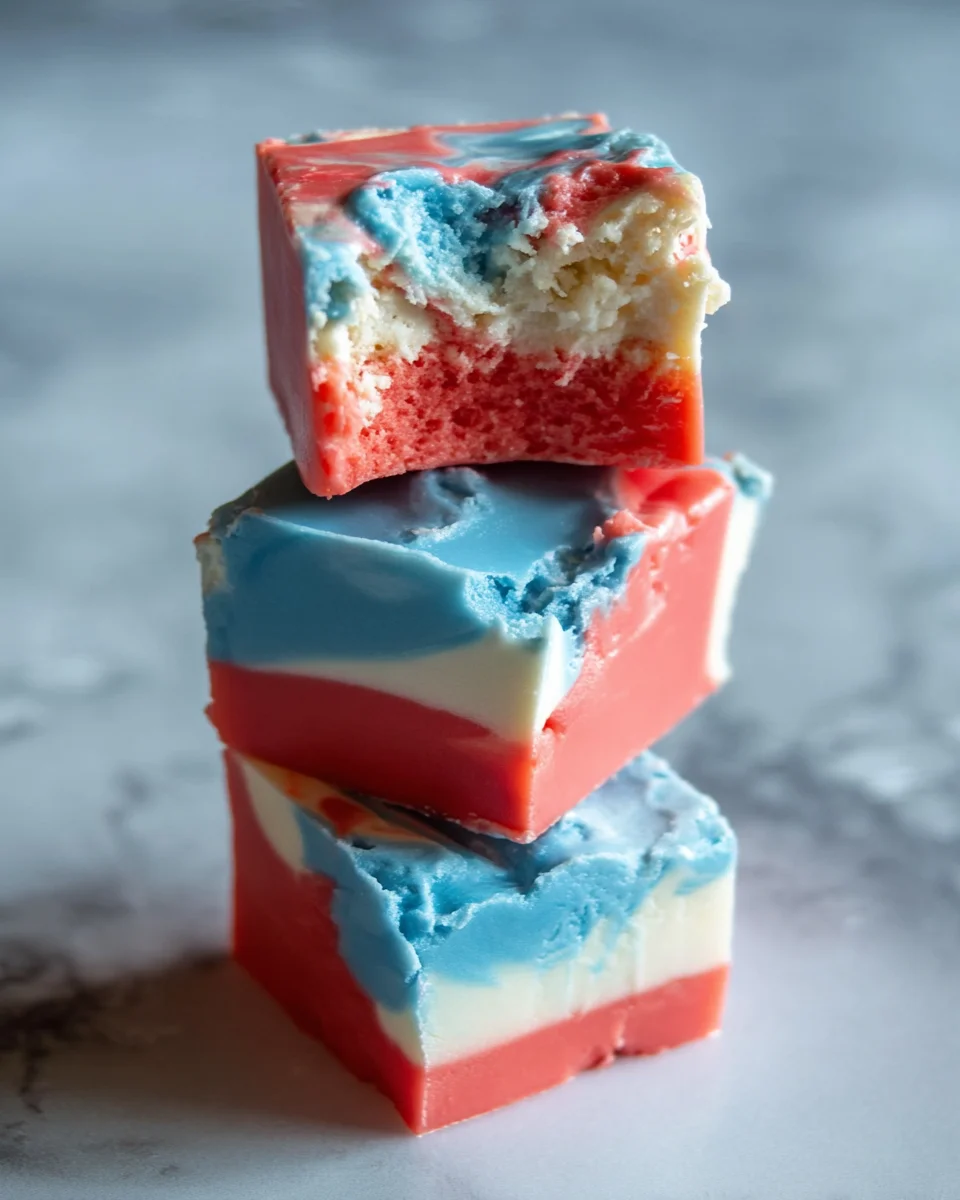
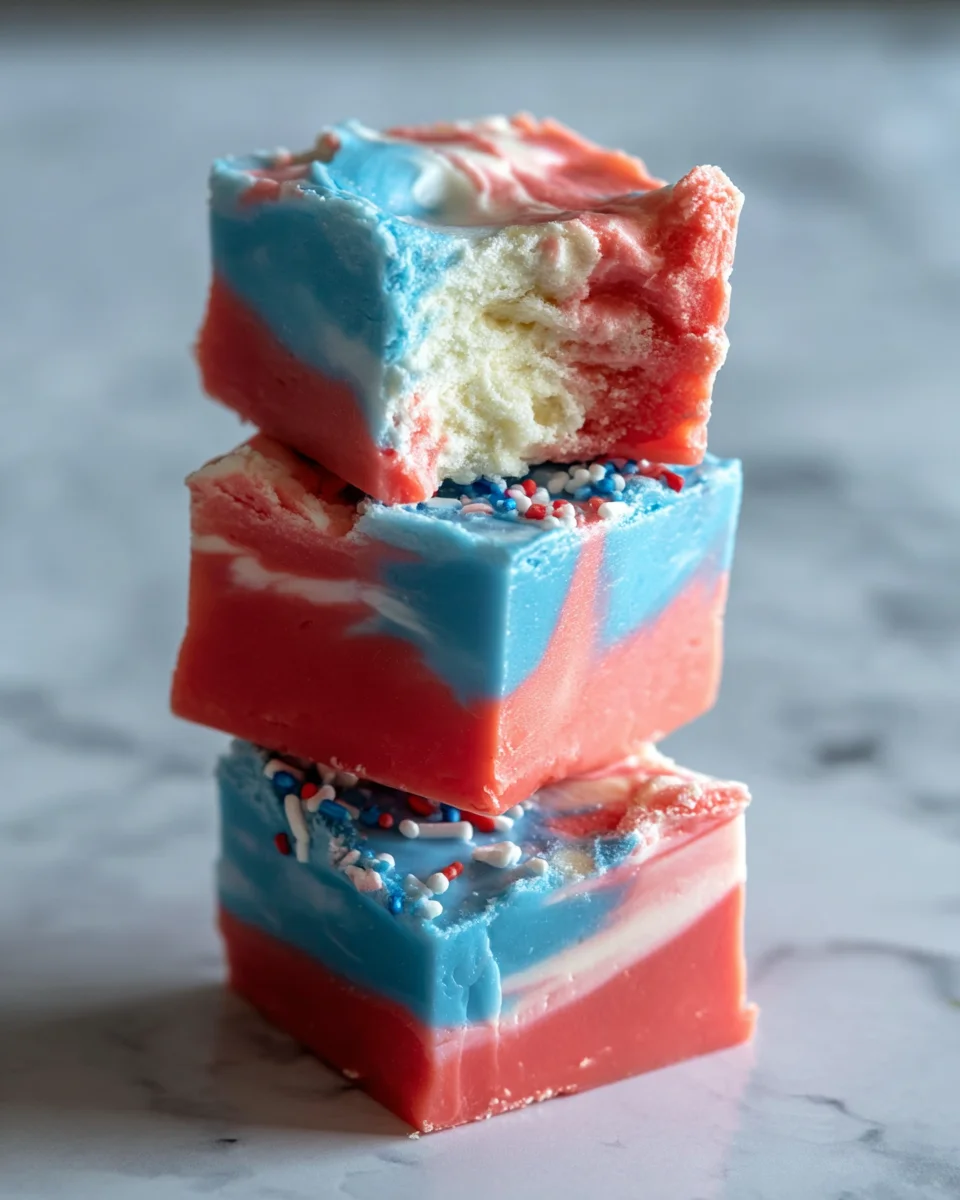
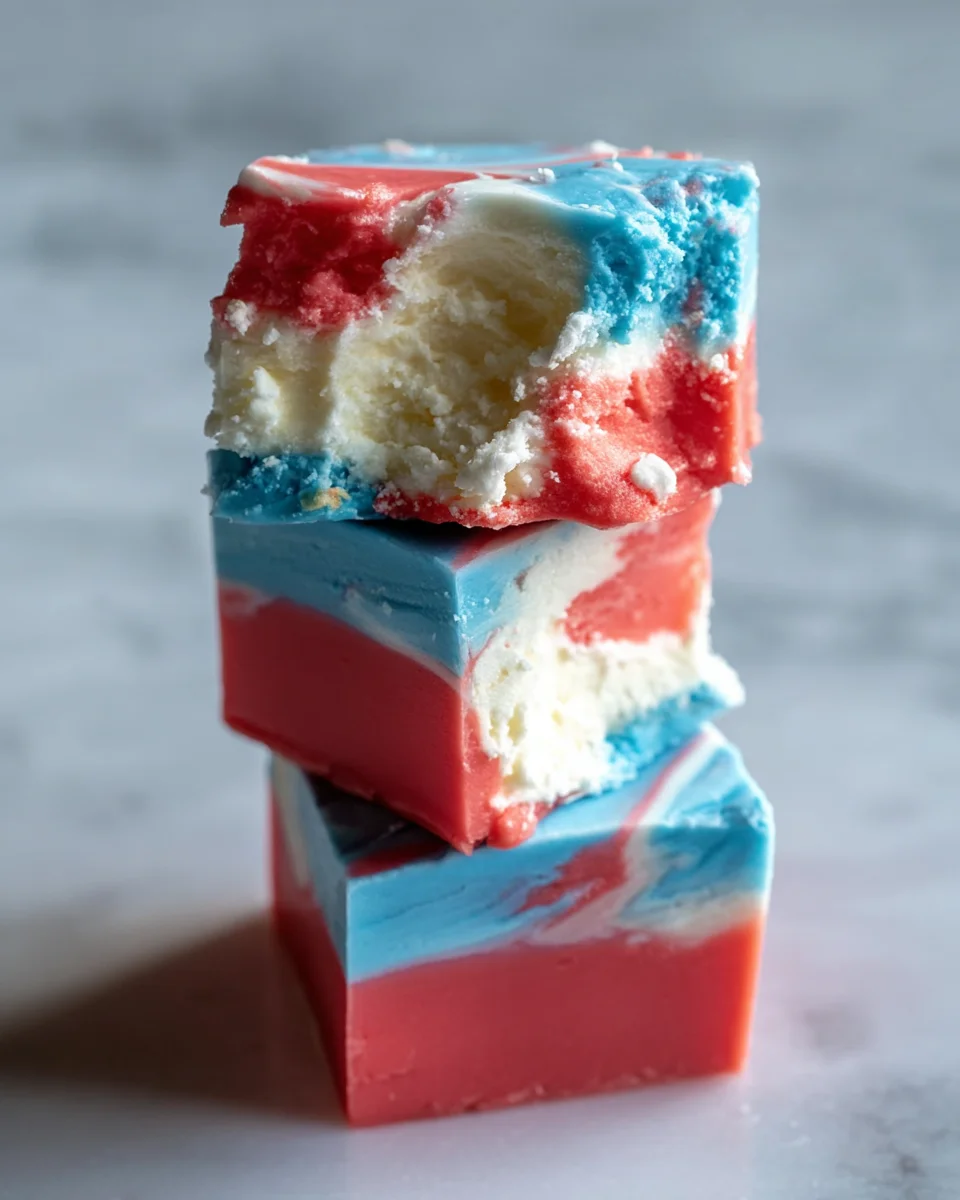
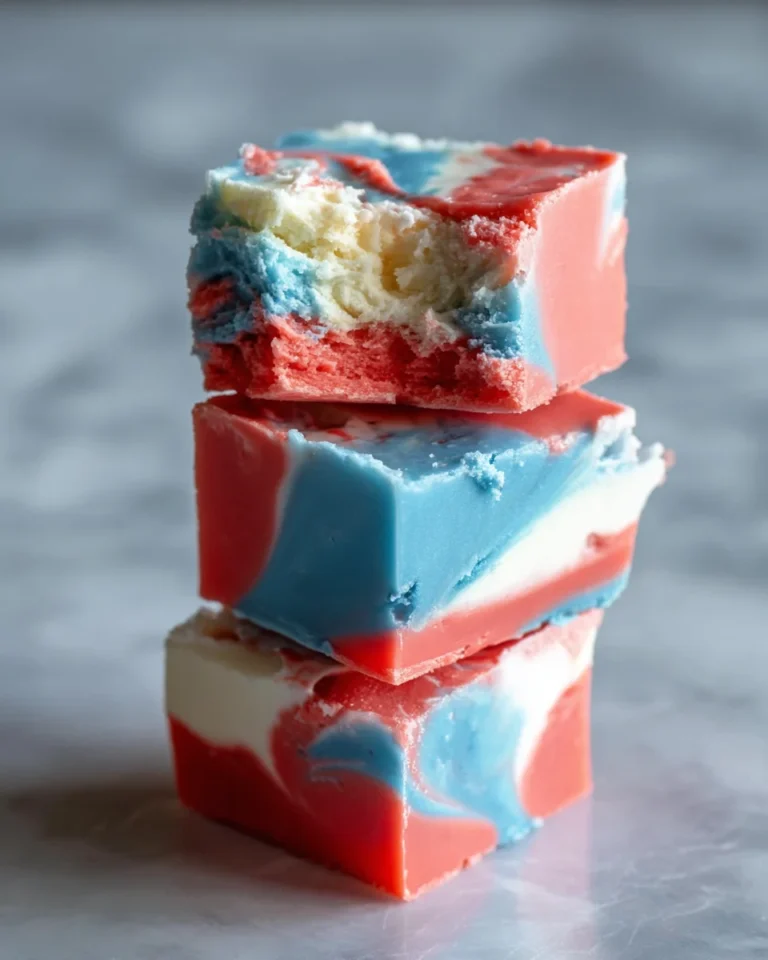
The 4th of July Tie Dyed Fudge is a delightful and vibrant treat that will brighten up your holiday celebrations. This colorful fudge not only captures the spirit of Independence Day but is also incredibly easy to make, making it perfect for family gatherings, picnics, and festive parties. With its stunning layers of red, white, and blue, this dessert will impress both kids and adults alike.

Why You’ll Love This 4th of July Tie Dyed Fudge
This fudge is a hit for various reasons.
- Visually Stunning: The tie-dye effect creates a beautiful presentation that’s perfect for celebrations.
- Easy to Make: With simple ingredients and straightforward steps, even beginner cooks can whip this up with ease.
- Versatile Treat: Great for the 4th of July but can be made for any patriotic occasion or fun celebration.
- Kid-Friendly: Kids love the colors and flavors, making it an excellent activity to do together in the kitchen.
- No-Bake Delight: This fudge requires minimal cooking time, allowing you to focus on other festivities.
Tools and Preparation
Before you start crafting your colorful fudge, gather the necessary tools to ensure a smooth process.
Essential Tools and Equipment
- 9×5 loaf pan
- Large saucepan
- Heat-safe bowls (3)
- Spatulas (3)
- Knife
Importance of Each Tool
- 9×5 loaf pan: Perfect size for layering your fudge and helps maintain its shape while setting.
- Large saucepan: Essential for melting the ingredients evenly without burning them.
- Heat-safe bowls: Necessary for mixing the different colored layers safely and effectively.
Ingredients
Gather these ingredients to create your 4th of July Tie Dyed Fudge. This recipe makes about 30 small squares.
For the Fudge Base
- 2 1/2 cups sugar
- 1/2 cup unsalted butter
- 1 5-oz can evaporated milk
- 2 cups marshmallow creme
- 1 1/3 cups white chocolate chips
- 1 teaspoon vanilla extract
For Coloring
- Red gel food coloring
- Blue gel food coloring
How to Make 4th of July Tie Dyed Fudge
Step 1: Prepare Your Pan
Line a 9×5 loaf pan with foil, ensuring that it hangs over the edges. Set aside for later.
Step 2: Combine Base Ingredients
In a large saucepan:
1. Combine unsalted butter, sugar, and evaporated milk.
2. Bring to a boil over medium heat while stirring constantly.
3. Boil for exactly 5 minutes.
Step 3: Add Marshmallow and Chocolate
Remove from heat:
1. Stir in marshmallow creme and white chocolate chips.
2. Mix until everything is melted and smooth.
3. Add in vanilla extract, stirring just until combined.
Step 4: Divide Mixture
Quickly divide the melted fudge into three heat-safe bowls:
1. Add red gel food coloring into one bowl.
2. Add blue gel food coloring into another bowl.
3. Leave the third bowl plain (white). Stir each color separately until mixed well but avoid blending colors together.
Step 5: Layer the Fudge
Pour each colored fudge into the prepared loaf pan:
1. Start with the red layer, smoothing it out with a clean spoon.
2. Next, add the white layer carefully on top.
3. Finally, pour in the blue layer, smoothing as you go.
Step 6: Create Swirls
Using a knife:
1. Gently drag through all layers in a zigzag motion without mixing too much.
2. Work quickly as this is a quick set fudge!
Step 7: Set and Cut
Allow your tie dyed fudge to set at room temperature for at least 2 hours before cutting:
1. Once set, lift out using foil edges.
2. Cut into small squares about 1 inch wide.
Enjoy your festive treat!
How to Serve 4th of July Tie Dyed Fudge
Serving 4th of July Tie Dyed Fudge is a delightful way to celebrate the holiday. This colorful treat not only looks festive but also brings joy to both kids and adults. Here are some fun serving suggestions.
Individual Squares
- Present the fudge cut into small squares for easy snacking. Each piece makes a perfect bite-sized treat.
Fudge Platter
- Arrange the fudge squares on a large platter. You can add decorative elements like fresh strawberries or blueberries for an extra patriotic touch.
Party Favor Bags
- Package individual pieces in clear bags tied with red, white, and blue ribbons. These make great take-home treats for guests.
Ice Cream Topping
- Crumble the fudge over vanilla ice cream. This combination adds a deliciously sweet crunch to your favorite ice cream flavors.
Dessert Table Centerpiece
- Include the fudge as part of a larger dessert table filled with other 4th of July desserts. Its vibrant colors will attract attention and enhance the festive atmosphere.
Fudge Sundae
- Create a sundae by layering fudge with whipped cream, ice cream, and cherries on top. It’s a fun twist that everyone will love!
How to Perfect 4th of July Tie Dyed Fudge
To ensure your 4th of July Tie Dyed Fudge turns out perfectly every time, follow these tips.
- Use Fresh Ingredients: Always use fresh butter and chocolate chips for the best flavor and texture in your fudge.
- Stir Constantly: When boiling the mixture, stir constantly to prevent burning and ensure even heating throughout.
- Work Quickly: The fudge sets fast, so work quickly when pouring layers into the pan for the best tie-dye effect.
- Avoid Overheating: Remove from heat as soon as everything melts together. Overheating can cause a grainy texture in your fudge.
- Cool Completely: Allow the fudge to cool completely before cutting it into squares, ensuring clean edges and proper setting.
- Experiment with Colors: Don’t hesitate to mix colors or add more layers for different celebrations beyond just red, white, and blue!
Best Side Dishes for 4th of July Tie Dyed Fudge
Pairing side dishes with your 4th of July Tie Dyed Fudge can create a well-rounded festive meal. Here are some excellent options to consider:
- Grilled Corn on the Cob: Sweet corn brushed with butter is a classic summer side that pairs well with sweet treats.
- Potato Salad: Creamy potato salad offers a savory contrast to the sweetness of fudge, making it an ideal companion at any barbecue.
- Coleslaw: A tangy coleslaw adds crunch and balances out the rich flavor of the fudge beautifully.
- Watermelon Slices: Refreshing watermelon is perfect for hot summer days and complements the vibrant colors of your dessert.
- BBQ Chicken Wings: The smoky flavor of grilled wings contrasts nicely with sweet desserts like tie-dyed fudge.
- Caprese Salad Skewers: Fresh mozzarella balls, tomatoes, and basil drizzled with balsamic glaze provide a refreshing bite alongside sweet treats.
- Pasta Salad: A zesty pasta salad can serve as a filling side dish that appeals to guests looking for something hearty before dessert.
- Fruit Kebabs: Colorful fruit skewers are not only healthy but also visually appealing alongside vibrant fudge squares!
Common Mistakes to Avoid
Making 4th of July Tie Dyed Fudge can be fun, but there are some common pitfalls to watch out for.
- Skipping the foil lining: Not lining your pan with foil can make it difficult to remove the fudge later. Always line the pan for easy removal.
- Not stirring enough: If you don’t stir the mixture constantly while boiling, it may scorch. Stir vigorously and continuously to avoid burning.
- Overheating the fudge: Heating the mixture too long can make it grainy. Remove from heat as soon as everything is melted and mixed well.
- Mixing colors prematurely: Mixing colors together will ruin the tie-dye effect. Use separate spatulas for each color and avoid blending them until layering begins.
- Cutting too soon: Cutting into the fudge before it’s fully set can lead to a messy result. Wait at least 2 hours for it to firm up properly.
Storage & Reheating Instructions
Refrigerator Storage
- Store in an airtight container.
- Fudge can last up to 2 weeks in the refrigerator.
Freezing Instructions
- Wrap tightly in plastic wrap, then place in a freezer-safe container.
- Can be frozen for up to 3 months.
Reheating Instructions
- Oven: Preheat oven to 200°F (93°C) and warm fudge for about 5-10 minutes until soft.
- Microwave: Heat in short bursts of 10-15 seconds, stirring in between until just softened.
- Stovetop: Place fudge in a saucepan over low heat, stirring constantly until softened.
Frequently Asked Questions
How do I make 4th of July Tie Dyed Fudge?
To make this colorful fudge, follow the recipe steps carefully, ensuring you layer the colors without mixing them together.
Can I customize the colors of my fudge?
Absolutely! While red and blue are traditional for July 4th, feel free to experiment with other colors for different occasions or themes.
How long does the fudge last?
When stored properly in an airtight container, this fudge lasts up to two weeks in the refrigerator and three months in the freezer.
Is this recipe suitable for kids?
Yes! This recipe is fun and easy for kids to help with. Just supervise them during boiling and mixing steps.
What should I serve with my tie dyed fudge?
This fudge pairs wonderfully with ice cream, fruit platters, or as part of a festive dessert table at holiday gatherings!
Final Thoughts
This 4th of July Tie Dyed Fudge is not only visually appealing but also deliciously sweet. Its versatility allows you to customize colors and flavors, making it perfect for any celebration. Don’t hesitate to try this easy recipe for your next festive gathering!
4th of July Tie Dyed Fudge
Celebrate this 4th of July with our vibrant Tie Dyed Fudge, a sweet treat that embodies the spirit of Independence Day. This colorful dessert features stunning layers of red, white, and blue, making it a showstopper at any festive gathering. Not only is it visually appealing, but it’s also incredibly easy to make—perfect for family fun in the kitchen! With just a few simple ingredients and no baking required, you can whip up a batch that will delight both kids and adults alike. Whether served on a platter or packaged as party favors, this fudge is sure to be a hit at your holiday celebrations.
- Total Time: 25 minutes
- Yield: Approximately 30 servings 1x
Ingredients
- 2 1/2 cups sugar
- 1/2 cup unsalted butter
- 1 can (5 oz) evaporated milk
- 2 cups marshmallow creme
- 1 1/3 cups white chocolate chips
- Red gel food coloring
- Blue gel food coloring
Instructions
- Prepare a 9×5 loaf pan by lining it with foil.
- In a large saucepan, combine sugar, butter, and evaporated milk. Bring to a boil over medium heat while stirring constantly for 5 minutes.
- Remove from heat and mix in marshmallow creme and white chocolate chips until smooth. Stir in vanilla extract.
- Divide the mixture into three bowls; color one red and another blue, leaving the last bowl plain.
- Layer the fudge colors in the prepared pan: red first, then white, followed by blue. Use a knife to swirl gently.
- Let set at room temperature for at least 2 hours before cutting into squares.
- Prep Time: 20 minutes
- Cook Time: 5 minutes
- Category: Desserts
- Method: No-Bake
- Cuisine: American
Nutrition
- Serving Size: 1 square (approx. 18g)
- Calories: 80
- Sugar: 10g
- Sodium: 20mg
- Fat: 4g
- Saturated Fat: 2g
- Unsaturated Fat: 2g
- Trans Fat: 0g
- Carbohydrates: 10g
- Fiber: 0g
- Protein: <1g
- Cholesterol: 5mg

Leave a Comment