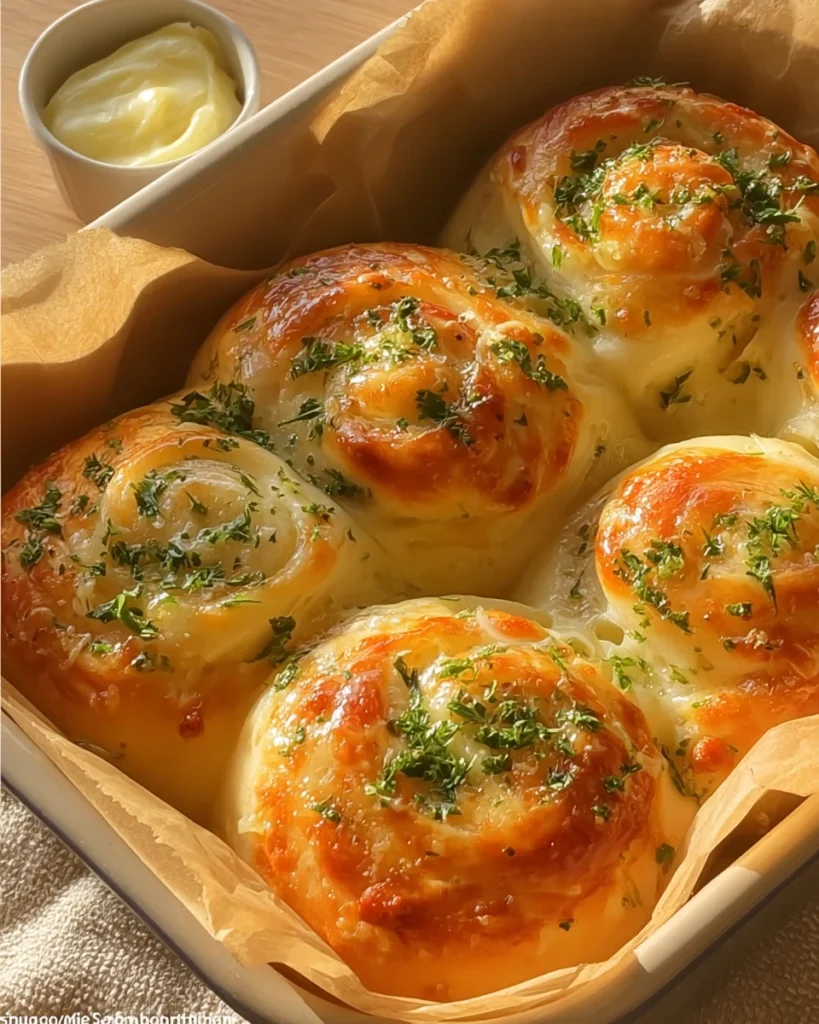
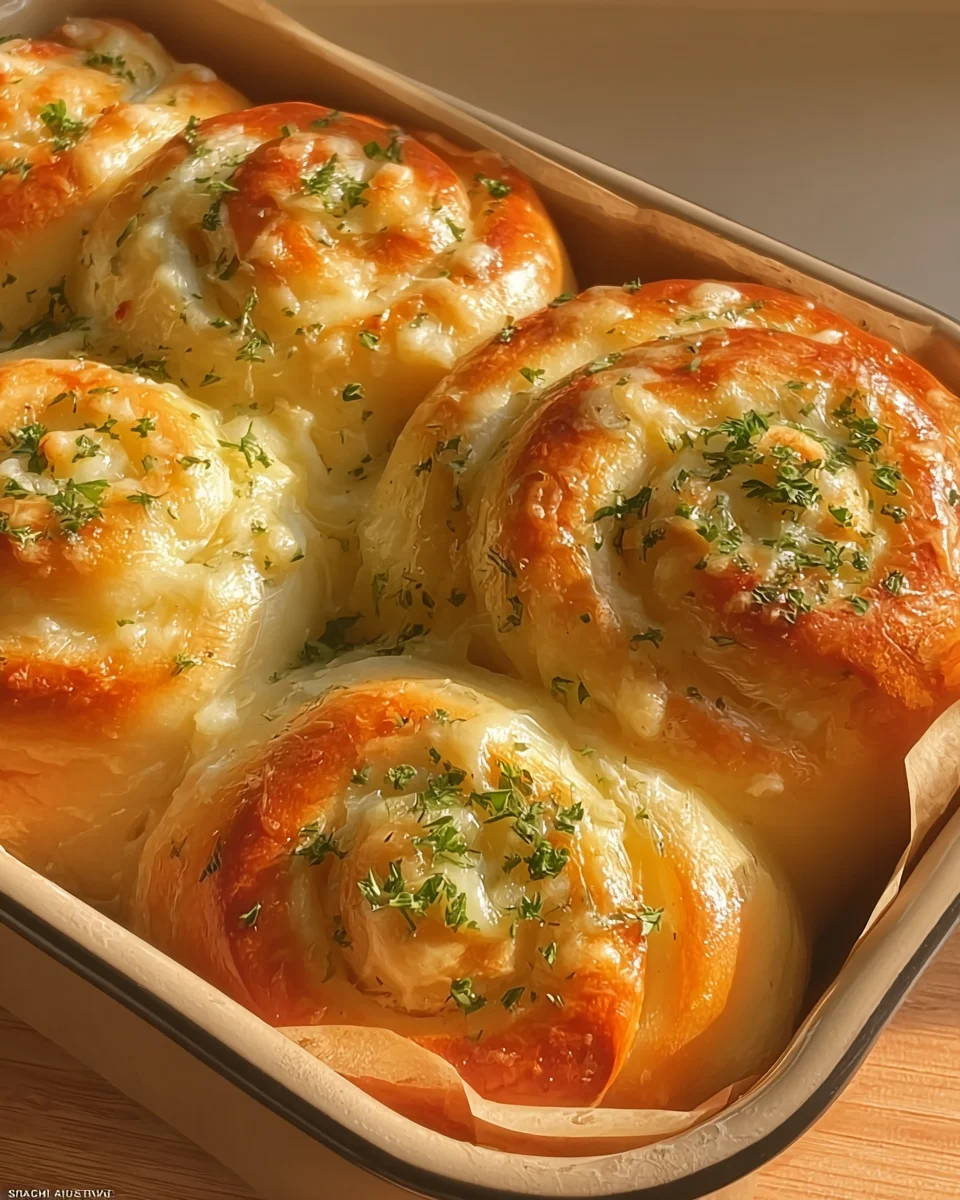
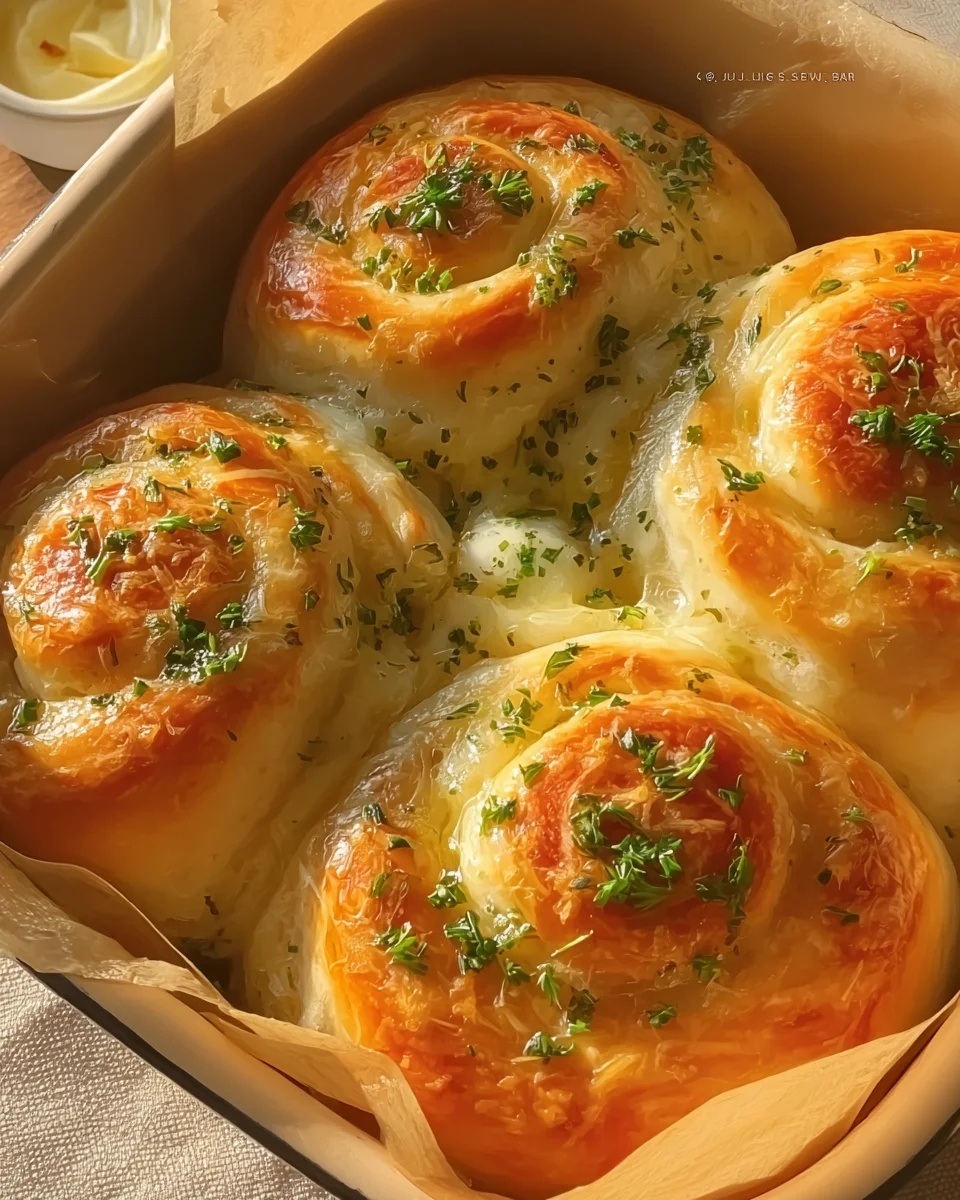
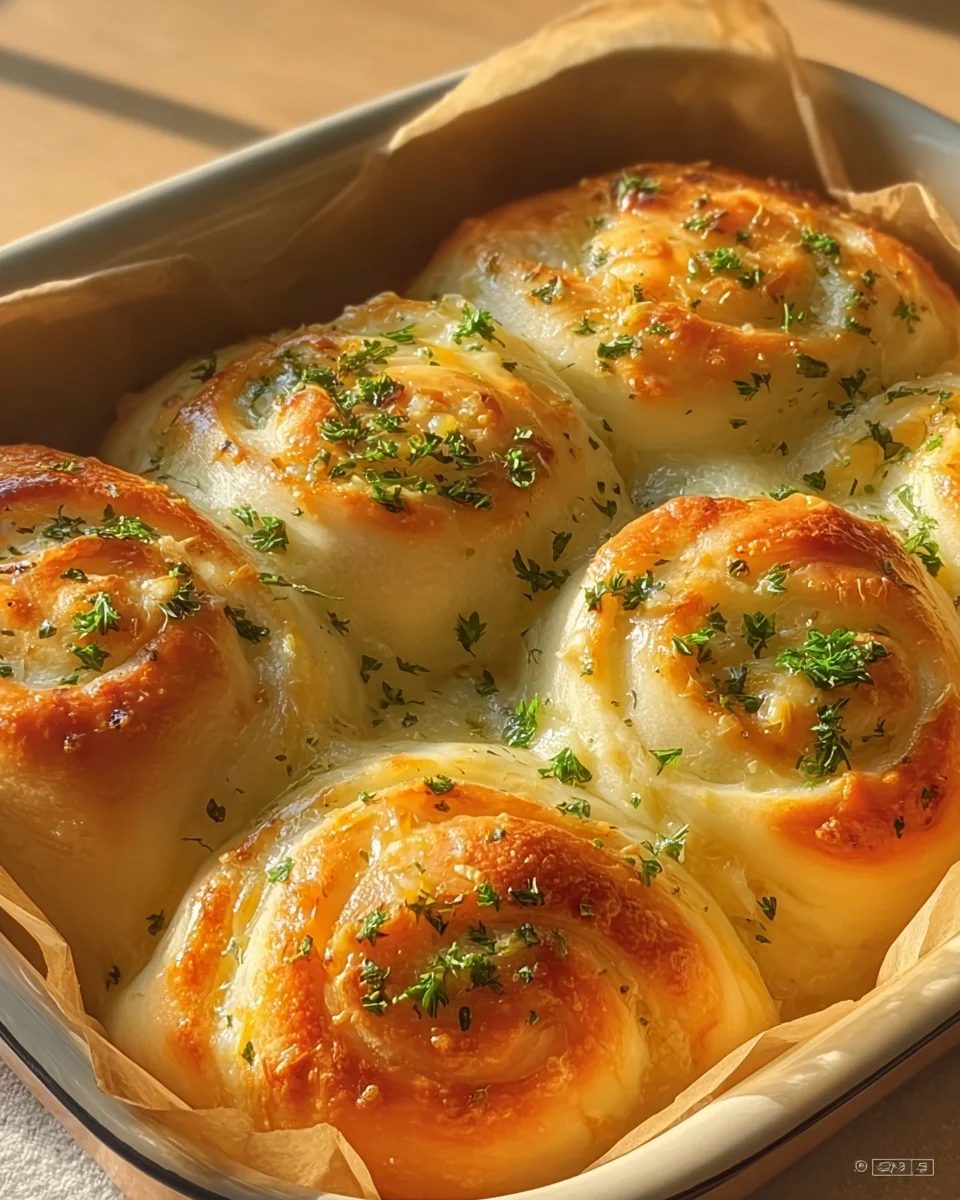
Indulge in the delightful experience of Cheesy Garlic Pull-Apart Rolls that are soft, fluffy, and filled with gooey cheese and rich garlic butter. These rolls are perfect for any gathering or as a side dish to elevate your favorite meals. Their unique combination of flavors makes them an instant hit, ensuring everyone will be reaching for more!
Why You’ll Love This Recipe
- Easy to Make: With simple ingredients and straightforward steps, these rolls are beginner-friendly.
- Flavor Explosion: The combination of garlic butter and melted mozzarella creates a mouthwatering taste that you’ll crave.
- Perfect for Any Occasion: Whether it’s a family dinner or a party, these rolls are versatile enough to suit any meal.
- Pull-Apart Fun: The fun of pulling apart each roll adds an interactive element to your dining experience.
- Make Ahead Option: You can prepare the dough in advance and bake them fresh when needed.
Tools and Preparation
Before you start making these delicious rolls, gather the necessary tools. Having the right equipment makes the process smoother and more enjoyable.
Essential Tools and Equipment
- Mixing bowl
- Measuring cups
- Measuring spoons
- Baking dish (9×13 inch)
- Rolling pin (optional)
- Towel
Importance of Each Tool
- Mixing bowl: A large bowl is essential for combining all your ingredients thoroughly.
- Baking dish: A 9×13 inch baking dish ensures even cooking and allows all rolls to fit comfortably.
Ingredients
To create these delectable Cheesy Garlic Pull-Apart Rolls, you’ll need the following ingredients:
For the Dough
- 2 cups all-purpose flour
- 1 tablespoon granulated sugar
- 1 teaspoon salt
- 1 teaspoon instant dry yeast
- ¾ cup warm milk (about 110°F)
- 2 tablespoons unsalted butter, melted
For the Filling
- 1 cup mozzarella cheese, shredded
For the Garlic Butter
- 4 tablespoons unsalted butter, melted
- 4 cloves garlic, minced
- 2 tablespoons fresh parsley, finely chopped
- ½ teaspoon dried Italian seasoning (optional)
How to Make Cheesy Garlic Pull-Apart Rolls
Step 1: Prepare the Dough
In a large mixing bowl, combine the flour, sugar, salt, and yeast. Gradually add warm milk and melted butter while mixing until a dough forms.
Step 2: Knead the Dough
Transfer the dough to a lightly floured surface. Knead for about 5-7 minutes until smooth and elastic. Place the dough in a greased bowl, cover it with a towel, and let it rise in a warm place for about 1 hour or until doubled in size.
Step 3: Shape the Rolls
Preheat your oven to 350°F (175°C). Once the dough has risen, punch it down and divide it into 12 equal pieces. Flatten each piece slightly. Place a tablespoon of mozzarella cheese in the center of each piece. Pinch the dough closed around the cheese and roll it into a ball.
Step 4: Prepare the Baking Dish
Arrange the rolled dough balls seam side down in a greased 9×13 inch baking dish.
Step 5: Make the Garlic Butter
In a small bowl, combine melted butter, minced garlic, fresh parsley, and Italian seasoning if using. Drizzle this garlic butter generously over the rolls.
Step 6: Bake the Rolls
Cover the dish with a towel and let the rolls rise again for about 30 minutes. Bake in your preheated oven for 20-25 minutes or until they are golden brown.
Step 7: Serve and Enjoy!
Once baked, let them cool for a few minutes before serving warm. Pull apart each roll to reveal their cheesy goodness inside. Enjoy every bite!
How to Serve Cheesy Garlic Pull-Apart Rolls
Cheesy Garlic Pull-Apart Rolls are versatile and can be enjoyed in many ways. They make a delightful appetizer or a comforting side dish that pairs well with various meals. Here are some serving suggestions that will elevate your dining experience.
As an Appetizer
- Dipping Sauce: Serve with marinara sauce or garlic aioli for added flavor.
- Cheese Platter: Pair them with a selection of cheeses for a savory snack.
With Soups
- Creamy Tomato Soup: These rolls are perfect for dipping into rich tomato soup.
- Hearty Vegetable Soup: The soft texture complements the chunky vegetables beautifully.
At Parties
- Buffet Style: Lay out the rolls on a serving platter for guests to help themselves.
- Game Day Snack: Perfect for sharing while watching the big game!
With Salads
- Caesar Salad: The cheesy goodness balances well with the crispness of Caesar salad.
- Garden Salad: Serve alongside a fresh garden salad for a light meal option.
How to Perfect Cheesy Garlic Pull-Apart Rolls
Achieving the perfect Cheesy Garlic Pull-Apart Rolls requires attention to detail. Here are some tips that will help you get it just right.
- Knead Thoroughly: Ensure the dough is kneaded for at least 5-7 minutes until elastic to achieve the best texture.
- Warm Environment: Let the dough rise in a warm place; this helps yeast activation and results in fluffy rolls.
- Use Fresh Ingredients: Fresh garlic and herbs enhance flavor, making your rolls even more delicious.
- Don’t Skip the Garlic Butter: Drizzling garlic butter before baking adds incredible flavor and moisture to the rolls.
- Cool Slightly Before Serving: Allow the rolls to cool for a few minutes before serving, ensuring they hold their shape when pulled apart.
Best Side Dishes for Cheesy Garlic Pull-Apart Rolls
Cheesy Garlic Pull-Apart Rolls pair wonderfully with many side dishes. Here are some great options to consider when planning your meal.
- Garden Salad: A refreshing mix of greens that adds crunch and balance to the meal.
- Creamy Mashed Potatoes: Rich and buttery, these potatoes make for an indulgent pairing.
- Roasted Vegetables: Seasonal veggies roasted until tender provide color and nutrition alongside the rolls.
- Chicken Alfredo Pasta: Creamy pasta complements the cheesy rolls perfectly for a hearty dinner.
- Italian Antipasto Platter: A variety of meats, cheeses, and olives create a flavorful accompaniment.
- Bruschetta: Toasted bread topped with tomatoes and basil offers a fresh contrast to the cheesy rolls.
Common Mistakes to Avoid
When making Cheesy Garlic Pull-Apart Rolls, it’s easy to make simple mistakes. Here are common pitfalls and how to avoid them.
- Incorrect Yeast Temperature: Using milk that is too hot can kill the yeast. Make sure the milk is warm, around 110°F, for optimal yeast activation.
- Over-Kneading Dough: Kneading too much can lead to tough rolls. Aim for 5-7 minutes until the dough is smooth and elastic.
- Skipping the Second Rise: Not allowing the rolls to rise again can result in dense rolls. Always let them rise until they double in size before baking.
- Not Measuring Ingredients Accurately: Incorrect measurements can affect texture and flavor. Use measuring cups and spoons for precision.
- Using Old Ingredients: Expired yeast or stale flour impacts the recipe’s success. Check your ingredients’ freshness before starting.
Refrigerator Storage
- Store in an airtight container for up to 3 days.
- Keep the rolls at room temperature if you plan to eat them within a day.
Freezing Cheesy Garlic Pull-Apart Rolls
- Freeze unbaked rolls for up to 2 months.
- For baked rolls, wrap tightly in foil or plastic wrap and store in a freezer-safe bag.
Reheating Cheesy Garlic Pull-Apart Rolls
- Oven: Preheat to 350°F (175°C). Bake for about 10-15 minutes until warmed through.
- Microwave: Heat on medium power for 15-20 seconds per roll. Cover with a damp paper towel to keep them moist.
- Stovetop: Place in a covered skillet on low heat for about 5 minutes, turning occasionally.
Frequently Asked Questions
What makes Cheesy Garlic Pull-Apart Rolls so special?
Cheesy Garlic Pull-Apart Rolls are loved for their soft texture and rich flavor combination of gooey cheese and garlic butter, making them perfect for any meal.
Can I customize my Cheesy Garlic Pull-Apart Rolls?
Absolutely! You can add herbs or different types of cheese based on your preference, like cheddar or pepper jack for extra flavor.
How do I know if my dough has risen enough?
The dough should double in size and feel light and airy when ready. You can gently poke it; if it springs back slowly, it’s ready.
Are these rolls suitable for freezing?
Yes! You can freeze both unbaked and baked rolls. Make sure they are stored properly to maintain freshness.
Final Thoughts
Cheesy Garlic Pull-Apart Rolls are not only delightful but also versatile as appetizers or side dishes. Their customizable nature allows you to experiment with flavors while enjoying the comforting experience of pulling apart warm, cheesy goodness. Give this recipe a try; your family will love it!

Cheesy Garlic Pull-Apart Rolls
Indulge in the irresistible delight of Cheesy Garlic Pull-Apart Rolls, a soft and fluffy treat bursting with gooey mozzarella and rich garlic butter. These rolls are perfect for any occasion, whether as a crowd-pleasing appetizer or a comforting side dish to elevate your favorite meals. The unique combination of flavors will have everyone reaching for more! With easy preparation steps and common ingredients, even beginner cooks can whip up this delicious recipe in no time.
- Total Time: 45 minutes
- Yield: Makes 12 rolls 1x
Ingredients
- 2 cups all-purpose flour
- 1 tablespoon granulated sugar
- 1 teaspoon salt
- 1 teaspoon instant dry yeast
- ¾ cup warm milk (about 110°F)
- 2 tablespoons unsalted butter, melted
- 1 cup mozzarella cheese, shredded
- 4 tablespoons unsalted butter, melted (for garlic butter)
- 4 cloves garlic, minced
- 2 tablespoons fresh parsley, chopped
Instructions
- In a large mixing bowl, combine flour, sugar, salt, and yeast. Gradually mix in warm milk and melted butter until a dough forms.
- Knead the dough on a floured surface for 5-7 minutes until smooth. Place in a greased bowl and let rise covered for about 1 hour or until doubled.
- Preheat oven to 350°F (175°C). Punch down the risen dough and divide into 12 pieces. Flatten each piece, place cheese inside, pinch closed, and form into balls.
- Arrange rolls seam side down in a greased baking dish.
- Mix melted garlic butter ingredients and drizzle over the rolls.
- Let rise again for about 30 minutes before baking for 20-25 minutes until golden brown.
- Prep Time: 20 minutes
- Cook Time: 25 minutes
- Category: Appetizer/Side Dish
- Method: Baking
- Cuisine: American
Nutrition
- Serving Size: 1 roll (50g)
- Calories: 150
- Sugar: 1g
- Sodium: 270mg
- Fat: 8g
- Saturated Fat: 4g
- Unsaturated Fat: 3g
- Trans Fat: 0g
- Carbohydrates: 15g
- Fiber: 0g
- Protein: 4g
- Cholesterol: 15mg
Leave a Comment