
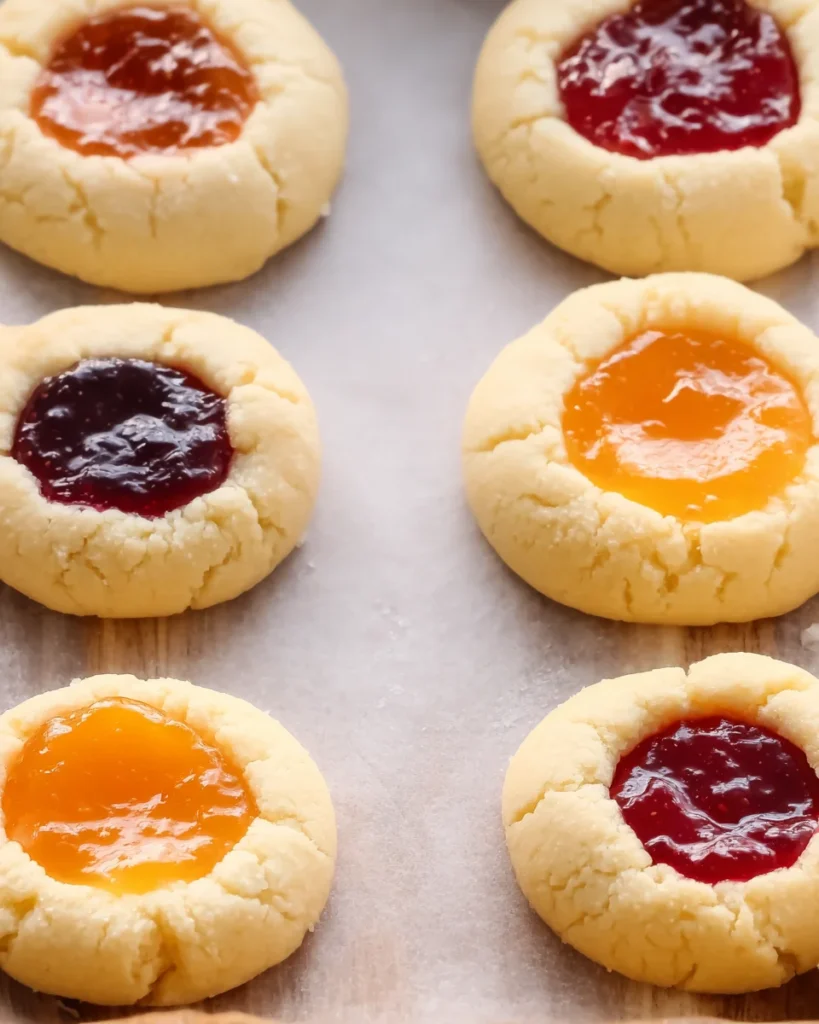
Classic Thumbprint Cookies are a delightful treat that brings warmth and nostalgia to any gathering. These cookies feature a rich, buttery base and are filled with your choice of luscious fruit preserves or silky chocolate ganache. Perfect for holiday baking or a cozy afternoon snack, Classic Thumbprint Cookies have a unique ability to please everyone. Their simple preparation and customizable fillings make them an irresistible addition to any dessert table.
Why You’ll Love This Recipe
- Easy to Make: With straightforward steps, you can whip up these cookies in no time.
- Customizable Fillings: Choose from various fruit preserves or chocolate for a personalized touch.
- Perfect for Any Occasion: Whether it’s a holiday party or a casual get-together, these cookies fit right in.
- Deliciously Buttery Flavor: The buttery cookie base pairs perfectly with the sweet filling, creating a delightful taste experience.
- Great for Sharing: With 24 cookies per batch, they are perfect for sharing with friends and family.
Tools and Preparation
Before diving into baking, gather your essential tools. Having everything ready makes the process smooth and enjoyable.
Essential Tools and Equipment
- Mixing bowl
- Whisk
- Baking sheet
- Parchment paper
- Measuring cups and spoons
Importance of Each Tool
- Mixing bowl: A spacious bowl is crucial for creaming the butter and sugar without mess.
- Whisk: This tool helps incorporate air into the dough, ensuring a light texture.
- Baking sheet: A sturdy baking sheet allows even heat distribution, resulting in perfectly baked cookies.
Ingredients
For the Cookies
- 1 cup unsalted butter, softened
- 1 cup granulated sugar
- 1 large egg yolk
- 1 teaspoon vanilla extract
- 2 1/4 cups all-purpose flour
- 1/2 teaspoon salt
For the Filling
- 1/2 cup fruit preserves or chocolate ganache
Optional Topping
- Powdered sugar for dusting

How to Make Classic Thumbprint Cookies
Step 1: Prepare the Dough
In a large mixing bowl, cream together the softened butter and granulated sugar until light and fluffy. Beat in the egg yolk and vanilla extract until well combined.
Step 2: Combine Dry Ingredients
In another bowl, whisk together the all-purpose flour and salt. Gradually add this mixture to the butter mixture, stirring until the dough comes together.
Step 3: Chill the Dough
Cover the dough with plastic wrap and refrigerate for at least 30 minutes to firm up.
Step 4: Preheat the Oven
Preheat your oven to 350°F (175°C) and line a baking sheet with parchment paper.
Step 5: Shape the Cookies
Once chilled, scoop tablespoon-sized portions of dough and roll them into balls. Place them on the prepared baking sheet, spacing about 2 inches apart.
Step 6: Make the Thumbprint
Use your thumb or the back of a spoon to create an indentation in each dough ball.
Step 7: Fill the Cookies
Spoon a small amount of fruit preserves or chocolate ganache into each indentation.
Step 8: Bake
Bake in the preheated oven for 12-15 minutes or until edges are lightly golden.
Step 9: Cool and Serve
Allow cookies to cool on the baking sheet for a few minutes before transferring them to a wire rack. Dust with powdered sugar if desired before serving. Enjoy these sweet morsels!
How to Serve Classic Thumbprint Cookies
Classic Thumbprint Cookies are versatile treats that can be enjoyed in various ways. Here are some delightful serving suggestions to make the most of these sweet morsels.
With a Glass of Milk
- Pair your cookies with a chilled glass of milk for a classic combination that enhances the cookie’s buttery flavor.
As a Dessert Platter
- Arrange your Classic Thumbprint Cookies on a dessert platter alongside other sweets like brownies and fruit tarts for an inviting display at parties.
With Fresh Berries
- Serve these cookies with fresh berries for a refreshing contrast. The tartness of the berries complements the sweetness of the cookies beautifully.
Dusted with Powdered Sugar
- For an elegant touch, dust your Classic Thumbprint Cookies with powdered sugar before serving. This adds a lovely visual appeal and extra sweetness.
Alongside Coffee or Tea
- Enjoy your cookies with a warm cup of coffee or tea. The flavors meld wonderfully, making it a perfect snack for afternoons or gatherings.
How to Perfect Classic Thumbprint Cookies
Making the perfect Classic Thumbprint Cookies is all about attention to detail. Follow these tips to ensure your cookies turn out delightful every time.
- Use Room Temperature Butter: Softened butter creates a creamy texture, making it easier to mix with sugar and ensuring light and fluffy cookies.
- Chill the Dough: Allowing your dough to chill helps prevent the cookies from spreading too much while baking, resulting in perfectly shaped thumbprints.
- Don’t Overwork the Dough: Mixing the dough just until combined helps maintain a tender texture. Overworking can lead to tough cookies.
- Make Indentations Before Baking: Creating thumbprints before baking ensures that they hold their shape while cooking and allows enough room for filling.
- Experiment with Fillings: Try different fruit preserves or chocolate ganache to find your favorite combinations. This adds variety and excitement to each batch!
Best Side Dishes for Classic Thumbprint Cookies
While Classic Thumbprint Cookies shine on their own, pairing them with side dishes can elevate any occasion. Here are some great options:
- Fruit Salad: A refreshing mix of seasonal fruits balances the sweetness of the cookies and adds vibrant colors to your spread.
- Ice Cream: Serve your cookies with a scoop of vanilla ice cream for an indulgent treat that contrasts nicely with the cookie’s texture.
- Cheese Platter: A selection of mild cheeses pairs well with sweet treats, offering an interesting flavor contrast when enjoyed together.
- Chocolate Fondue: Dip your thumbprint cookies in warm chocolate fondue for an extra layer of decadence that chocolate lovers will adore.
- Yogurt Parfaits: Layer yogurt, granola, and crushed thumbprint cookies in glasses for a delicious breakfast or dessert option that’s both satisfying and visually appealing.
- Nut Mix: A bowl of mixed nuts provides crunch and saltiness that complements sweet flavors beautifully, making it an excellent snack option alongside the cookies.
Common Mistakes to Avoid
Making Classic Thumbprint Cookies can be a delightful experience, but certain mistakes can lead to less-than-perfect results. Here are some common pitfalls to avoid.
- Using cold butter: Cold butter will not cream properly with sugar, resulting in dense cookies. Always ensure your butter is softened before mixing.
- Skipping the chilling step: Chilling the dough helps the cookies hold their shape while baking. Don’t skip this crucial step for best results.
- Overfilling the thumbprint: Adding too much filling can cause it to overflow during baking. A small spoonful is usually sufficient—aim for just enough to fill the indentation.
- Not measuring flour correctly: Too much flour can lead to dry cookies. Use the spoon-and-level method for accurate measurement.
- Baking at the wrong temperature: Baking at an incorrect temperature can affect texture and doneness. Always preheat your oven properly before baking.
Storage & Reheating Instructions
Refrigerator Storage
- Store Classic Thumbprint Cookies in an airtight container for up to 1 week.
- Place parchment paper between layers if stacking to prevent sticking.
Freezing Classic Thumbprint Cookies
- Freeze cookies in an airtight container or freezer bag for up to 3 months.
- Ensure they are completely cooled before freezing to maintain texture.
Reheating Classic Thumbprint Cookies
- Oven: Preheat your oven to 350°F (175°C) and warm cookies for about 5-7 minutes.
- Microwave: Heat on low power for 10-15 seconds, checking frequently to avoid overheating.
- Stovetop: Place cookies in a skillet over low heat for a couple of minutes until warm.
Frequently Asked Questions
How do I make Classic Thumbprint Cookies gluten-free?
You can substitute all-purpose flour with a gluten-free flour blend. Make sure it contains xanthan gum or add it separately for better texture.
Can I use different fillings for Classic Thumbprint Cookies?
Absolutely! Feel free to experiment with various fillings like nut butters, caramel, or different fruit preserves according to your taste.
How long do Classic Thumbprint Cookies last?
When stored properly in an airtight container, these cookies can last up to one week at room temperature or up to three months in the freezer.
What is the best way to customize Classic Thumbprint Cookies?
You can customize these cookies by adding spices like cinnamon or nutmeg, or by using flavored extracts such as almond or citrus.
Can I make Classic Thumbprint Cookies ahead of time?
Yes! You can prepare the dough in advance, chill it, and then bake the cookies when you’re ready. This makes them perfect for holiday baking!
Final Thoughts
Classic Thumbprint Cookies are not only delicious but also incredibly versatile. You can customize them with your favorite fillings and flavors, making them suitable for any occasion. Whether you enjoy them fresh out of the oven or as a sweet treat later on, these cookies are sure to bring joy and satisfaction. Try this recipe today and create your own delightful variations!

Classic Thumbprint Cookies
Classic Thumbprint Cookies are a timeless treat that combines a rich, buttery base with the sweetness of fruit preserves or chocolate ganache. These delightful cookies are perfect for any occasion, from festive gatherings to cozy afternoons at home. Their easy preparation allows for endless customization, making them a beloved choice among cookie enthusiasts. Whether you enjoy them fresh from the oven or share them with friends and family, Classic Thumbprint Cookies are sure to evoke warmth and nostalgia with every bite.
- Total Time: 30 minutes
- Yield: Approximately 24 cookies 1x
Ingredients
- 1 cup unsalted butter, softened
- 1 cup granulated sugar
- 1 large egg yolk
- 1 teaspoon vanilla extract
- 2 1/4 cups all-purpose flour
- 1/2 teaspoon salt
- 1/2 cup fruit preserves or chocolate ganache (for filling)
Instructions
- Preheat the oven to 350°F (175°C) and line a baking sheet with parchment paper.
- In a mixing bowl, cream together the softened butter and granulated sugar until light and fluffy. Beat in the egg yolk and vanilla until well combined.
- In another bowl, whisk together flour and salt. Gradually add this to the butter mixture, stirring until the dough forms.
- Chill the dough for at least 30 minutes in the refrigerator.
- Roll tablespoon-sized portions of dough into balls and place them on the prepared baking sheet, spaced about 2 inches apart.
- Create an indentation in each ball using your thumb or a spoon, then fill with fruit preserves or chocolate ganache.
- Bake for 12-15 minutes until edges are lightly golden. Allow to cool before serving.
- Prep Time: 15 minutes
- Cook Time: 15 minutes
- Category: Dessert
- Method: Baking
- Cuisine: American
Nutrition
- Serving Size: 1 serving
- Calories: 100
- Sugar: 6g
- Sodium: 25mg
- Fat: 6g
- Saturated Fat: 3g
- Unsaturated Fat: 2g
- Trans Fat: 0g
- Carbohydrates: 10g
- Fiber: <1g
- Protein: <1g
- Cholesterol: 15mg

Leave a Comment