
Fermented Elderberry Honey is a delightful and healthful treat that not only satisfies your sweet tooth but also boosts your immune system. Perfect for any occasion, this unique recipe combines the earthy taste of elderberries with the sweetness of raw honey, creating a delicious remedy for colds and flu. Enjoy it as a natural supplement or simply as a tasty addition to your daily routine.

Why You’ll Love This Fermented Elderberry Honey
This fermented elderberry honey is not just nutritious; it’s also versatile and easy to make.
- Immune Boosting: Packed with antioxidants, elderberries help strengthen your immune system.
- Natural Sweetener: Use it in tea, smoothies, or on toast for a healthier alternative to sugar.
- Simple Process: The fermentation method is straightforward and requires minimal effort.
- Probiotic Benefits: This honey contains beneficial bacteria that promote gut health.
- Versatile Uses: Incorporate it into various recipes or enjoy it by the spoonful.
Tools and Preparation
To create this health-boosting fermented elderberry honey, having the right tools makes all the difference.
Essential Tools and Equipment
- Pint-sized mason jar
- Plastic storage lid or parchment paper
- Spoon for stirring
Importance of Each Tool
- Pint-sized mason jar: Ideal for fermentation; it allows enough space for bubbles to form without spilling.
- Plastic storage lid or parchment paper: Prevents metal contact with acidic ingredients and allows gas to escape during fermentation.
Ingredients
To make Fermented Elderberry Honey, you will need the following ingredients:
For the Elderberry Mixture
- 1 cup fresh black or blue elderberries (do not use red elderberries)
- 1-1.5 cups raw honey
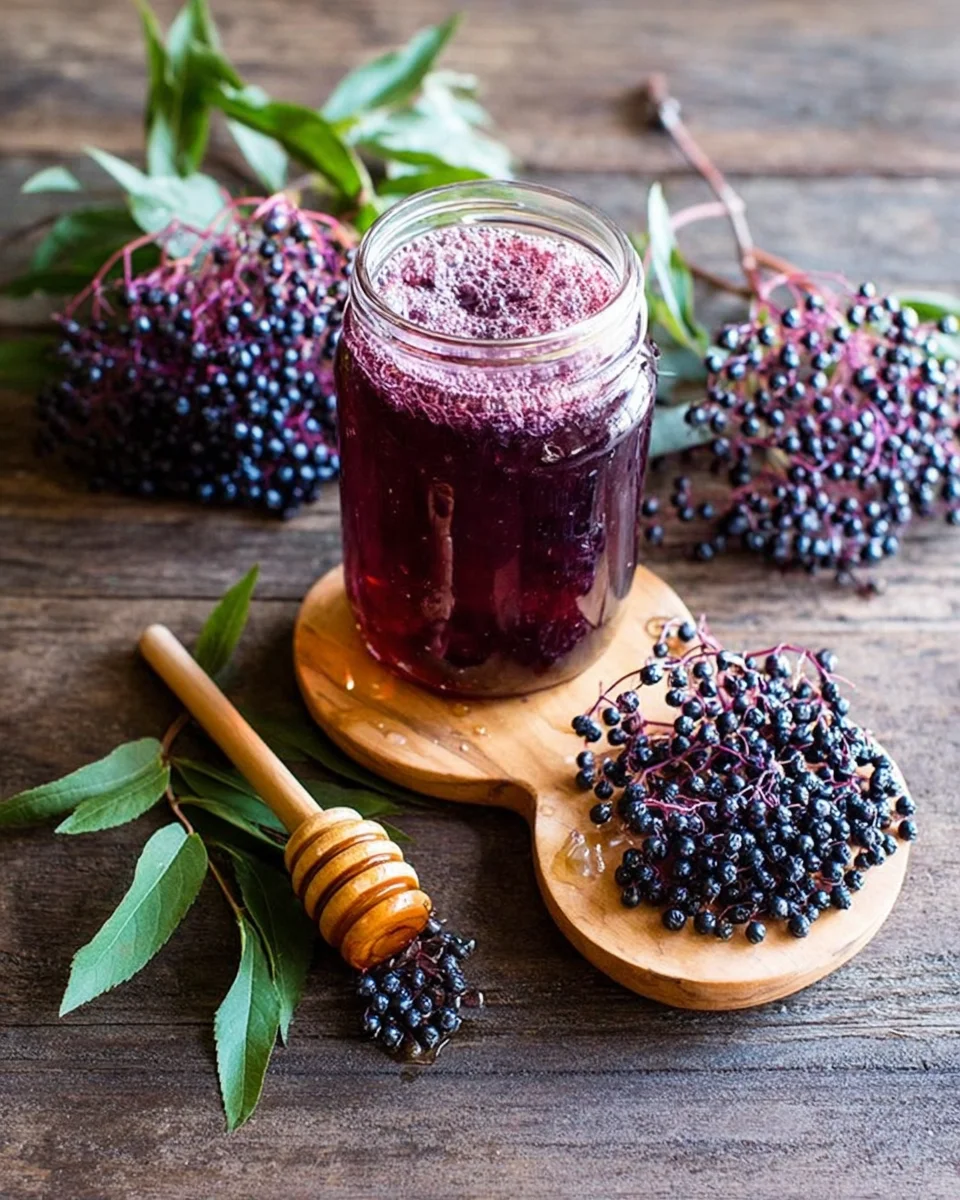
How to Make Fermented Elderberry Honey
Step 1: Prepare the Jar
Put the elderberries into a pint-sized mason jar, then add the honey to cover the berries, leaving at least an inch of headspace at the top of the jar.
Step 2: Invert the Jar
Cap the jar with a plastic storage lid or use a piece of parchment paper underneath the metal lid. Invert the jar for about 30 minutes or longer to ensure that all of the elderberries are coated with honey.
Step 3: Settle and Adjust Honey Level
Turn the jar upright again. After settling, check if any air bubbles are gone. You may need to add more honey to cover the berries fully.
Step 4: Allow Airflow During Fermentation
Loosen the lid to allow air to escape during fermentation and place the jar somewhere out of the way. For the first 2-3 days, invert the jar daily then turn it upright again. Remember to tighten the lid before inverting and loosen once upright.
Step 5: Monitor Fermentation Progress
Within about 2-3 days (could be longer in cooler temperatures), you should begin to see small bubbles on the surface, and the honey will be noticeably runnier.
Step 6: Stirring for Active Fermentation
After one or two weeks, you will see many bubbles! Stir occasionally to encourage fermentation. The honey can be used anytime after this point and will continue fermenting slowly.
Step 7: Strain Before Use
Strain out the elderberries before consuming your fermented elderberry honey.
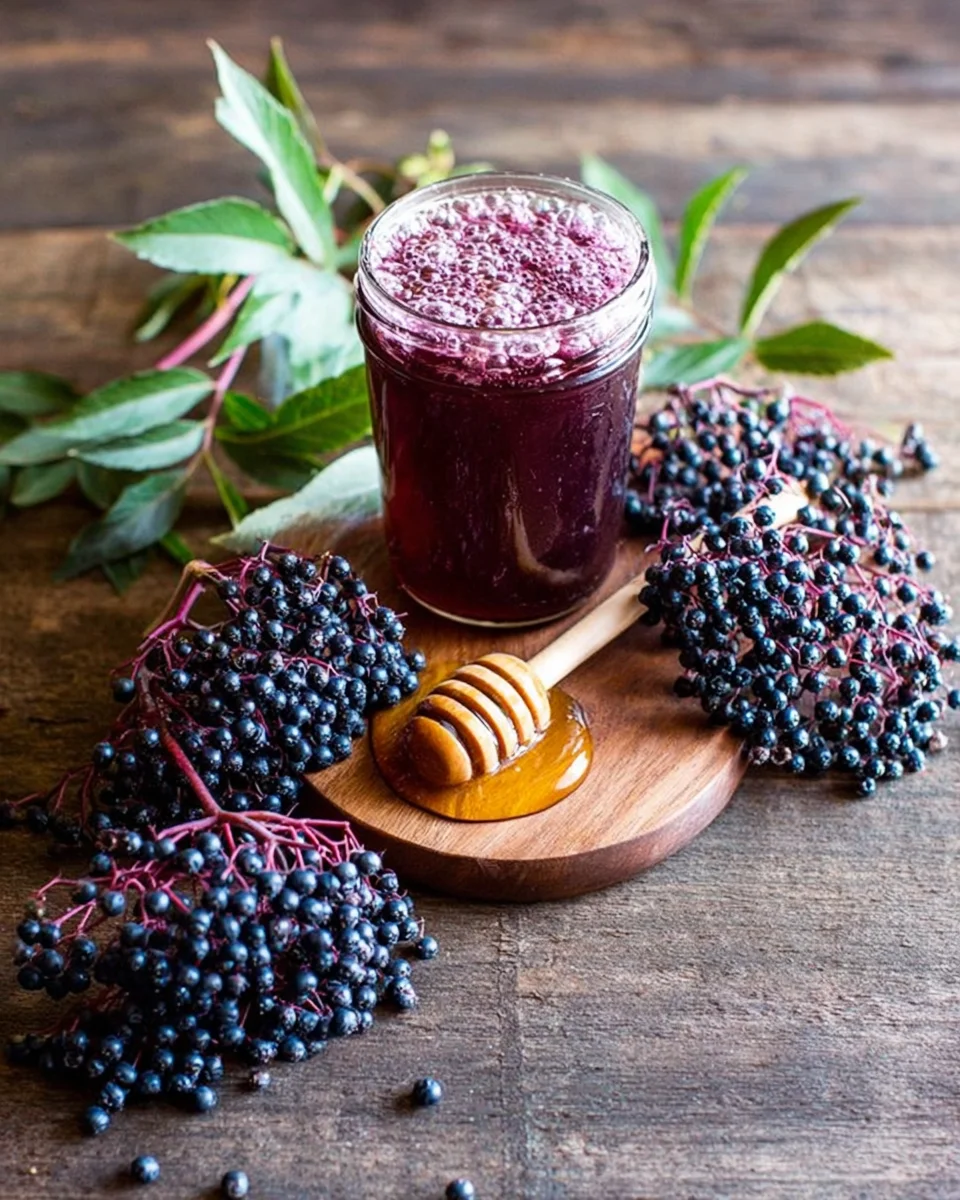
Step 8: Enjoy Your Remedy!
Take a spoonful two to three times per day when you feel sickness coming on to shorten cold or flu duration.
Notes
Dried elderberries can also be used but must be rehydrated in water first before mixing with honey.
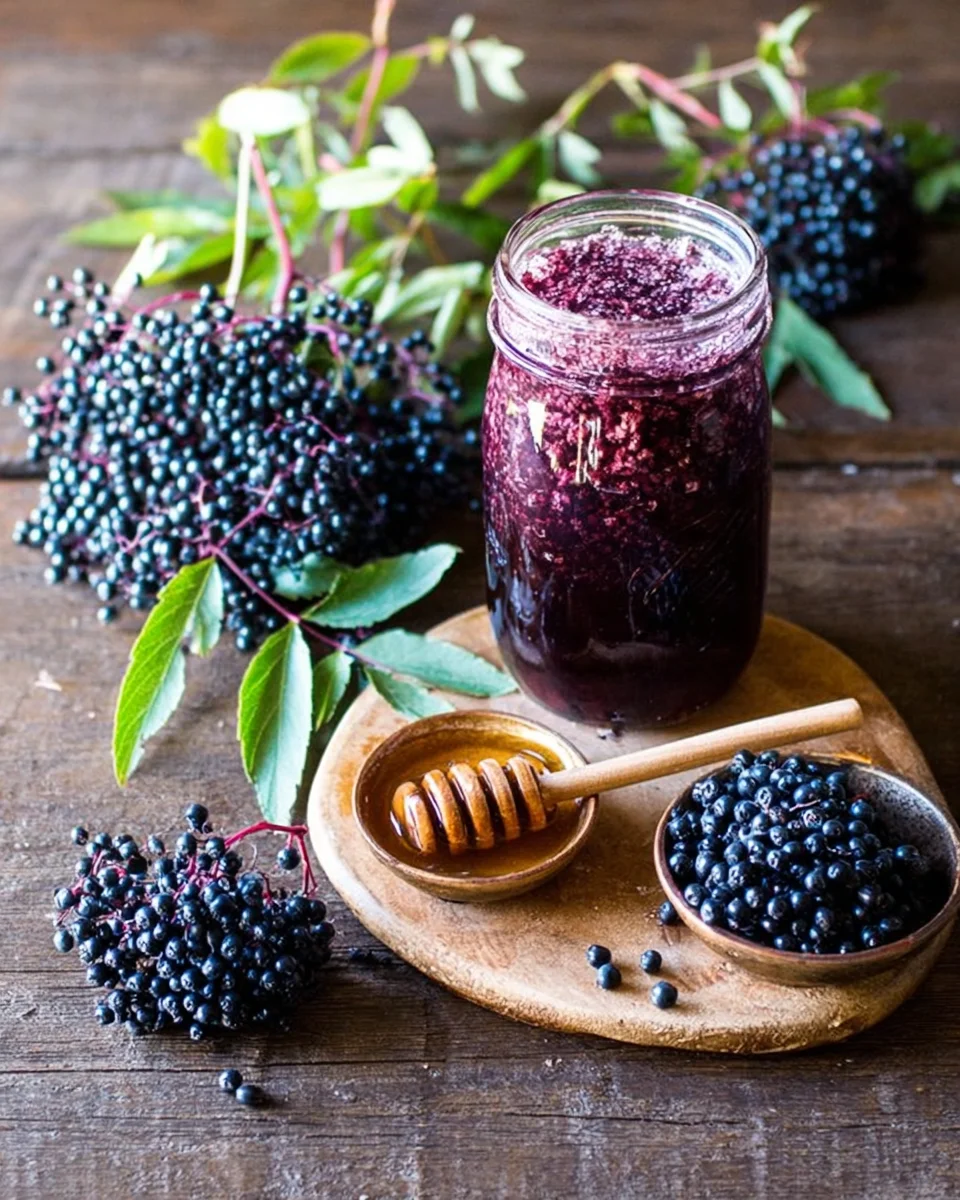
How to Serve Fermented Elderberry Honey
Fermented elderberry honey is not only a delightful treat but also a powerhouse of health benefits. You can enjoy this immune-boosting concoction in various ways that enhance its flavor and effectiveness.
Daily Wellness Boost
- Spoonful: Take 1 tablespoon directly for a quick health kick.
- Smoothie Addition: Blend it into your morning smoothie for added sweetness and nutrients.
Flavor Enhancer
- Yogurt Topping: Drizzle over plain yogurt for a delicious breakfast or snack.
- Tea Sweetener: Stir into herbal teas to add natural sweetness and health benefits.
Gourmet Ingredient
- Cheese Pairing: Serve with cheese boards for a unique flavor contrast.
- Salad Dressing: Mix with olive oil and vinegar to create a sweet vinaigrette.
How to Perfect Fermented Elderberry Honey
Perfecting fermented elderberry honey can elevate both its flavor and health benefits. Here are some tips to ensure the best results.
- Use Fresh Berries: Fresh black or blue elderberries yield better flavor than dried.
- Monitor Airflow: Loosening the lid is crucial for fermentation; it prevents pressure buildup.
- Patience is Key: Allow the mixture to ferment for at least one week for optimal bubbles and flavor.
- Stir Occasionally: Giving it a gentle stir helps distribute flavors evenly while promoting bubbles.
- Taste Test: Sample after one week; if it’s too sweet, let it ferment longer before straining.
- Store Properly: Keep in a cool, dark place to prolong its shelf life and preserve flavors.
Best Side Dishes for Fermented Elderberry Honey
Pairing side dishes with fermented elderberry honey can enhance your dining experience. Here are some great options that complement its unique taste.
- Brie Cheese: The creamy texture and mild flavor pair beautifully with the sweet-tart notes of fermented elderberry honey.
- Roasted Nuts: Almonds or walnuts tossed with this honey create a crunchy, sweet snack perfect for parties.
- Whole Grain Crackers: These provide a crunchy base that enhances the flavors without overpowering them.
- Mixed Green Salad: A fresh salad with vinaigrette made from fermented elderberry honey adds sweetness and depth.
- Fruit Platter: Serve alongside seasonal fruits like apples or pears for an easy, healthy dessert option.
- Pancakes or Waffles: Drizzle over breakfast favorites as a flavorful alternative to syrup, enhancing both taste and nutrition.
Common Mistakes to Avoid
When making Fermented Elderberry Honey, it’s easy to overlook a few key steps. Here are some common mistakes and how to avoid them.
- Using the wrong type of elderberries: Always use fresh black or blue elderberries. Red elderberries can be toxic and should never be used in this recipe.
- Not leaving enough headspace: Ensure there’s at least an inch of headspace in your jar. This allows for proper fermentation without overflow.
- Tightening the lid too much: Loosen the lid to let gases escape during fermentation. A tightly sealed jar can lead to pressure buildup and spoilage.
- Ignoring air bubbles: If you don’t see bubbles after a few days, it might mean fermentation isn’t happening. Try stirring gently or checking the jar’s temperature.
- Not straining before consuming: Make sure to strain out the elderberries before taking your fermented honey. The berries can affect the taste if left in too long.
Refrigerator Storage
- Store your Fermented Elderberry Honey in a clean, airtight mason jar.
- It will last up to 6 months in the refrigerator.
Freezing Instructions
- You can freeze your fermented honey for longer storage.
- Use freezer-safe containers or silicone ice cube trays for easy portioning.
- Fermented Elderberry Honey can last up to a year in the freezer.
Reheating Instructions
- Oven: Preheat to 200°F (93°C) and warm your honey gently for about 10-15 minutes. Avoid high temperatures that may kill beneficial bacteria.
- Microwave: Heat on low for 10-20 seconds, checking frequently. Stir well afterward; do not overheat.
- Stovetop: Place in a saucepan over low heat until warm, stirring often. This method helps maintain flavor without overheating.
Frequently Asked Questions
How long does Fermented Elderberry Honey last?
Fermented Elderberry Honey can last up to six months in the refrigerator and up to a year if frozen properly.
Can I use dried elderberries for Fermented Elderberry Honey?
Yes, you can use dried elderberries, but they need rehydration in water before mixing with honey.
What are the benefits of Fermented Elderberry Honey?
This fermented treat boosts immunity, helps shorten illness duration, and offers antioxidant benefits due to its rich ingredients.
How should I take Fermented Elderberry Honey?
Take one spoonful two to three times daily when feeling under the weather. It acts as a natural remedy against colds and flu.
Can I customize my Fermented Elderberry Honey?
Absolutely! You can add spices like cinnamon or ginger for added flavor and health benefits.
Final Thoughts
Making Fermented Elderberry Honey is not only simple but also offers numerous health advantages. You can easily customize it with different spices or sweeteners. We encourage you to try this versatile recipe for an immune-boosting treat!

Fermented Elderberry Honey
Fermented Elderberry Honey is a delightful blend of earthy elderberries and sweet raw honey that not only satisfies your cravings but also supports your immune system. This easy-to-make recipe transforms simple ingredients into a powerful health remedy, perfect for combating colds and flu. With its rich flavor and numerous health benefits, this fermented treat is ideal for enhancing your daily routine, whether enjoyed by the spoonful or as an ingredient in various dishes. Elevate your wellness with this delicious addition to your pantry!
- Total Time: 0 hours
- Yield: Approximately 12 servings (1 tablespoon each) 1x
Ingredients
- 1 cup fresh black or blue elderberries (avoid red elderberries)
- 1–1.5 cups raw honey
Instructions
- Place the elderberries in a pint-sized mason jar and pour in enough honey to cover them, leaving at least an inch of headspace.
- Cap the jar with a plastic lid or parchment paper, then invert it for about 30 minutes to coat the berries thoroughly.
- Turn the jar upright, check for air bubbles, and add more honey if necessary to fully cover the berries.
- Loosen the lid for airflow during fermentation; store the jar out of direct sunlight.
- Invert daily for 2-3 days, then monitor for bubbles; stir occasionally to promote fermentation over one to two weeks.
- Strain before consuming and enjoy as needed.
- Prep Time: 10 minutes
- Cook Time: N/A
- Category: SIDES
- Method: Fermentation
- Cuisine: N/A
Nutrition
- Serving Size: 1 tablespoon
- Calories: 64
- Sugar: 17g
- Sodium: 0mg
- Fat: 0g
- Saturated Fat: 0g
- Unsaturated Fat: 0g
- Trans Fat: 0g
- Carbohydrates: 17g
- Fiber: 0g
- Protein: 0g
- Cholesterol: 0mg
Leave a Comment