
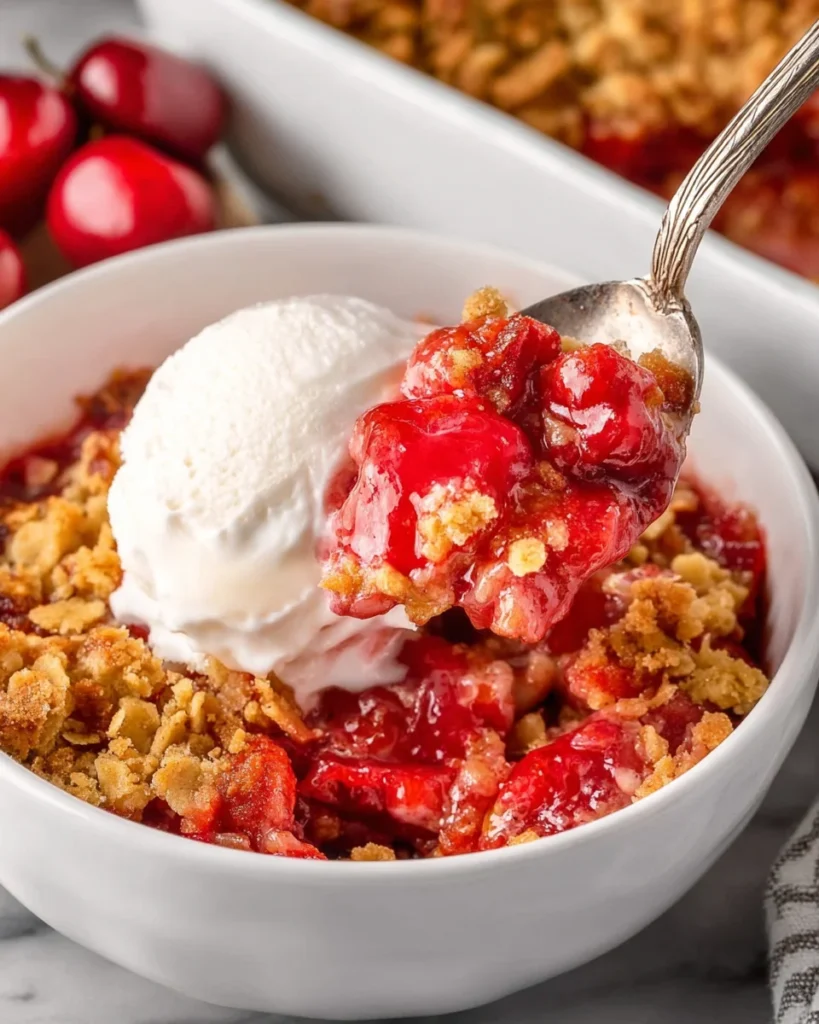
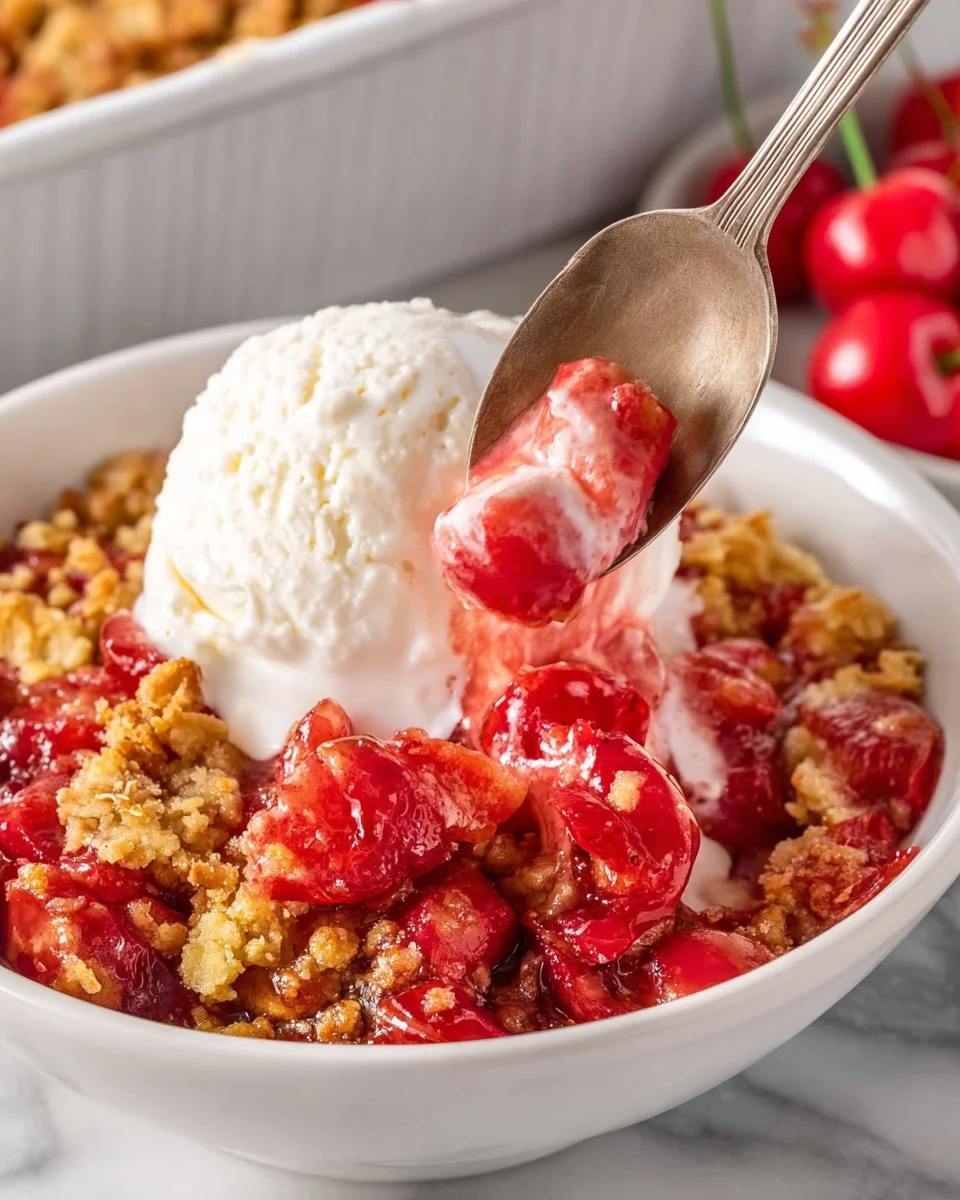
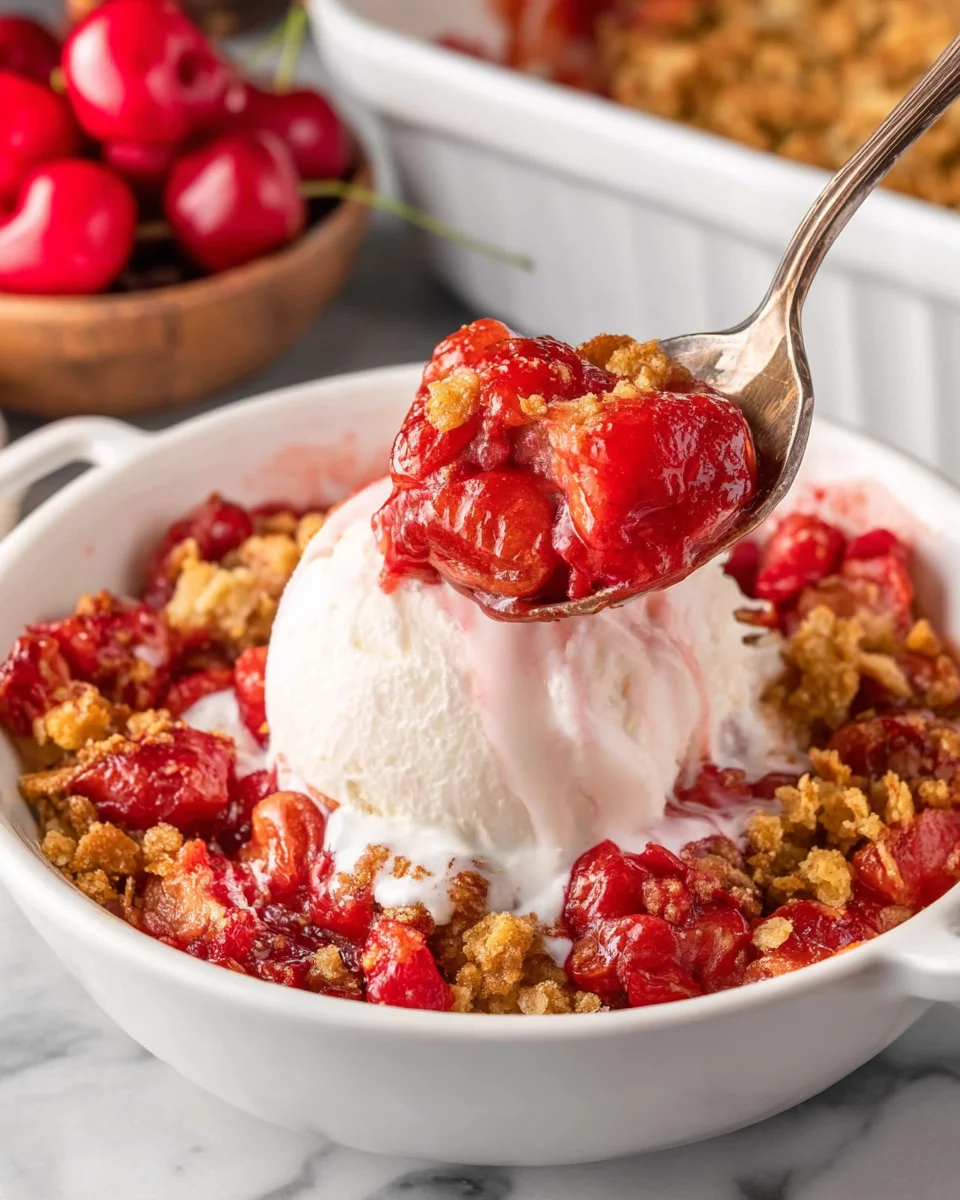
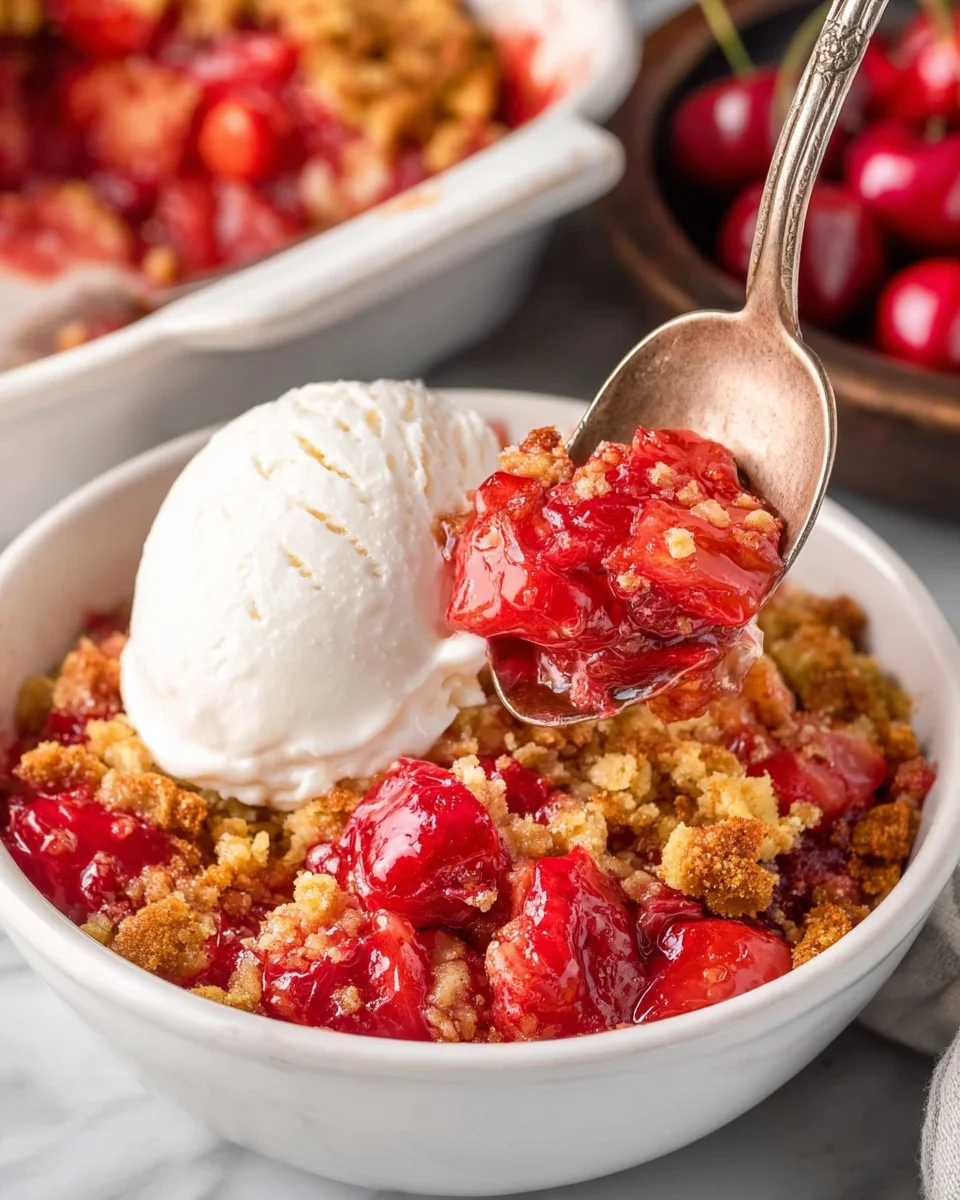
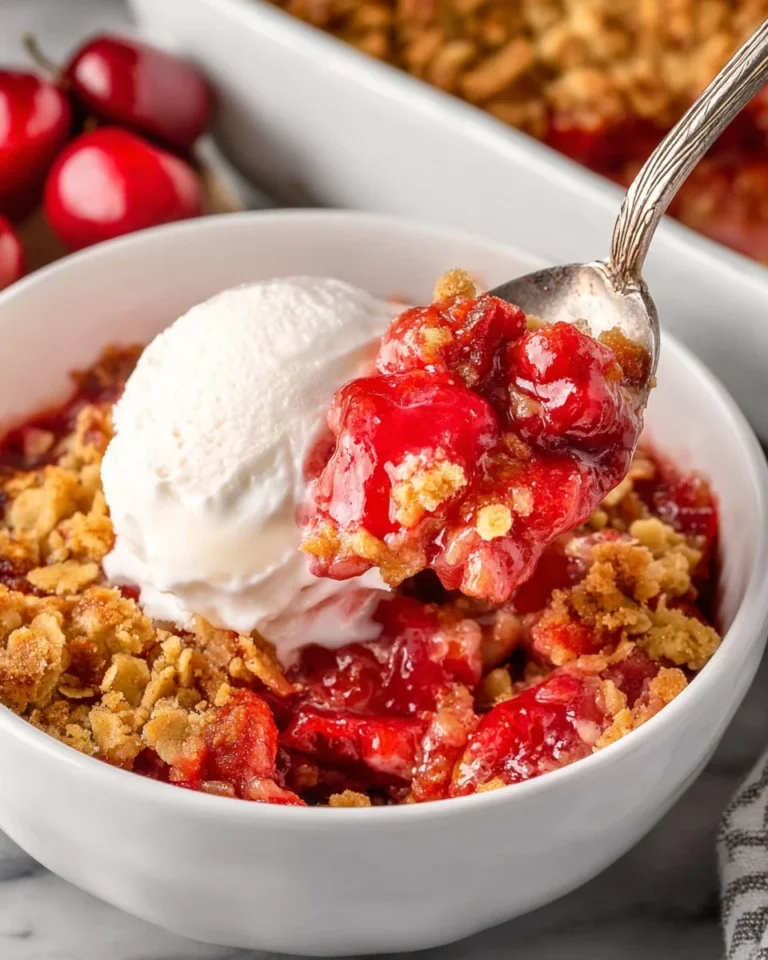
Homemade Cherry Crumble is the perfect dessert for any occasion. This delightful treat combines sweet, juicy cherry pie filling with a golden, buttery crumble topping. It’s a simple yet satisfying recipe that everyone will love! Whether you’re hosting a family gathering or just want to indulge in something sweet, this homemade cherry crumble offers comfort and flavor. Serve it warm with vanilla ice cream for an irresistible dessert experience.
Why You’ll Love This Homemade Cherry Crumble
This homemade cherry crumble is more than just a dessert; it’s a versatile dish that brings joy to any gathering.
- Easy to Make: With just a few simple steps, you can whip up this delicious dessert in no time.
- Delicious Flavor: The combination of cherries and buttery crumble creates an unforgettable taste.
- Versatile Serving Options: Enjoy it warm or cold, with ice cream or whipped cream — the choice is yours!
- Perfect for Any Occasion: Whether it’s a casual weeknight treat or a special celebration, this crumble fits right in.
- Made with Canned Cherries: Using canned cherries makes this recipe quick and accessible year-round.
Tools and Preparation
Having the right tools makes preparing your homemade cherry crumble easier and more enjoyable.
Essential Tools and Equipment
- Baking pan (8-inch or 9-inch)
- Mixing bowls
- Pastry cutter or fork
- Measuring cups and spoons
Importance of Each Tool
- Baking Pan: A sturdy baking pan ensures even cooking for your crumble.
- Mixing Bowls: Multiple bowls help keep your ingredients organized during preparation.
- Pastry Cutter: This tool makes it easy to blend butter into dry ingredients, creating the perfect crumb topping.
Ingredients
To make this delightful homemade cherry crumble, you will need the following ingredients:
Cherry Filling
- 2 cans cherry pie filling (21 ounce cans [for a total of 42 ounces filling])
- 1 cup granulated sugar
- 3 tablespoons cornstarch
- 1 teaspoon lemon zest
- 2 tablespoons lemon juice
- 1 teaspoon pure vanilla extract
Crumble Topping
- 1 cup all-purpose flour
- 1/2 cup rolled oats
- 1/2 cup light brown sugar (packed)
- 1/2 teaspoon ground cinnamon
- 1/4 teaspoon fine-grain salt (or table salt)
- 1/2 cup unsalted butter (cold; cut into cubes)
How to Make Homemade Cherry Crumble
Step 1: Preheat the Oven
Preheat your oven to 375°F. Prepare an 8-inch or 9-inch square or round baking pan by lightly greasing it if desired.
Step 2: Prepare the Cherry Filling
In a large mixing bowl:
1. Combine the cherry pie filling, granulated sugar, cornstarch, lemon juice, and vanilla extract.
2. Mix until well combined. Don’t worry if there are small lumps; they will dissolve while baking.
Step 3: Transfer Filling to Baking Dish
Carefully transfer the cherry filling mixture into your prepared baking dish. Spread it out evenly across the bottom.
Step 4: Make the Crumble Topping
In another mixing bowl:
1. Combine the flour, rolled oats, brown sugar, cinnamon, and salt.
2. Add the cold cubed butter.
3. Use your fingers or a pastry cutter to mix until the mixture resembles coarse crumbs.
Step 5: Assemble the Crumble
Evenly sprinkle the crumble topping over the cherry pie filling layer in your baking dish.
Step 6: Bake
Place in the preheated oven and bake for about 50-60 minutes, until the filling is bubbling and the topping is golden brown.
Step 7: Cool and Serve
Once done, remove from the oven and allow it to cool for a few minutes before serving. This homemade cherry crumble can be enjoyed warm or cold alongside a generous scoop of vanilla ice cream or a dollop of whipped cream.
How to Serve Homemade Cherry Crumble
Serving Homemade Cherry Crumble can elevate this delicious dessert experience. Here are a few delightful ways to enjoy it.
Classic with Ice Cream
- Serve warm cherry crumble topped with a generous scoop of vanilla ice cream for the perfect blend of temperatures and flavors.
Whipped Cream Delight
- Add a dollop of freshly whipped cream on top to enhance the sweetness and add a light texture.
Fresh Fruit Garnish
- Place fresh cherries or berries on top for a pop of color and added freshness that complements the dish.
Drizzle Chocolate Sauce
- A drizzle of chocolate sauce can add a rich contrast to the tartness of the cherries, making each bite even more indulgent.
Pair with Coffee
- Serve alongside a cup of freshly brewed coffee for a comforting dessert experience that balances sweetness with a rich beverage.
How to Perfect Homemade Cherry Crumble
Creating the perfect Homemade Cherry Crumble is all about the details. Here are some tips to ensure your dessert shines.
- Choose quality canned cherries – The flavor and texture of your cherry pie filling will significantly impact the overall taste. Opt for high-quality brands for best results.
- Use cold butter – Cold butter helps create that flaky, crumbly texture in the topping. Avoid letting it soften before mixing.
- Don’t overmix the crumble – Mixing just until combined will keep your topping light and airy. Overworking can lead to a dense topping.
- Let it cool slightly – Allowing your cherry crumble to cool for a few minutes before serving helps it set up, making it easier to slice and serve.
- Experiment with spices – Adding nutmeg or almond extract can provide an additional layer of flavor that complements the cherries beautifully.
Best Side Dishes for Homemade Cherry Crumble
Complementing your Homemade Cherry Crumble with side dishes can enhance your meal. Here are some great options:
- Vanilla Ice Cream – A classic pairing that adds creaminess and balances the tartness of cherries.
- Fresh Berry Salad – A light and refreshing salad that contrasts well with the rich crumble, offering a burst of freshness.
- Custard – A warm vanilla custard can be poured over or served alongside, adding smoothness and richness.
- Cheese Plate – A selection of mild cheeses can provide a savory counterpoint to the sweet dessert.
- Chocolate Mousse – This indulgent treat pairs well for those who enjoy rich desserts alongside their fruit options.
- Coffee Cake – For brunch or tea time, serve coffee cake as an alternative sweet option that complements cherry flavors.
- Granola Parfait – Layers of yogurt, granola, and fresh fruit make for a nutritious side that’s still satisfying.
- Lemon Sorbet – This refreshing sorbet cleanses the palate and provides a zesty contrast to the sweet crumble.
Common Mistakes to Avoid
Avoiding common mistakes can enhance your Homemade Cherry Crumble experience. Here are some pitfalls to watch out for:
- Using Overripe Cherries: Ensure you use cherries that are firm and fresh. Overripe cherries can make the filling too mushy and watery.
- Not Measuring Ingredients Accurately: Baking is a science, so measure your ingredients carefully. Using too much or too little sugar or cornstarch can change the texture and taste.
- Skipping the Cooling Time: Allow the crumble to cool before serving. Cutting into it too soon can result in a messy presentation.
- Using Warm Butter: Make sure your butter is cold when making the crumble topping. This helps create that ideal crumbly texture.
- Baking at Incorrect Temperature: Always preheat your oven. If the temperature is off, your crumble may not cook evenly.
Storage & Reheating Instructions
Refrigerator Storage
- Store leftover Homemade Cherry Crumble in an airtight container.
- It can last in the refrigerator for up to 3-4 days.
Freezing Instructions
- To freeze, place the crumble in an airtight freezer-safe container.
- It can be stored for up to 2-3 months for optimal freshness.
Reheating Instructions
- Oven: Preheat to 350°F and bake for about 15-20 minutes until warmed through.
- Microwave: Heat individual portions on high for 30-60 seconds, checking often.
- Stovetop: Place a slice in a pan over low heat, cover, and warm for about 5 minutes.
Frequently Asked Questions
Can I use fresh cherries instead of canned?
Yes, you can use fresh cherries! Just pit and slice them, adjusting the sugar based on their sweetness.
How do I make a gluten-free version of Homemade Cherry Crumble?
Substitute the all-purpose flour with a gluten-free flour blend. Ensure all other ingredients are gluten-free as well.
Can I add other fruits to my cherry crumble?
Absolutely! You can mix in blueberries, raspberries, or even peaches for added flavor and texture.
What is the best way to serve Homemade Cherry Crumble?
Serve warm with a scoop of vanilla ice cream or a dollop of whipped cream for an indulgent treat!
How do I know when my cherry crumble is done baking?
The crumble will be golden brown on top, and you should see bubbling around the edges of the dish.
Final Thoughts
This Homemade Cherry Crumble is not only easy to prepare but also incredibly versatile. With its rich flavors and delightful texture, it makes for a perfect dessert any time of year. Feel free to customize it by adding different fruits or nuts to suit your taste!
Homemade Cherry Crumble
Homemade Cherry Crumble is a delightful dessert that combines sweet, juicy cherries with a buttery, crumbly topping. This easy recipe is perfect for any occasion, whether you’re hosting a family gathering or just indulging in something sweet. Serve it warm with vanilla ice cream for an irresistible treat that everyone will adore! Using canned cherries makes this dish quick and accessible year-round, ensuring you can enjoy its comforting flavors whenever the craving strikes.
- Total Time: 1 hour 15 minutes
- Yield: Approximately 8 servings 1x
Ingredients
- 2 cans cherry pie filling (21 oz each)
- 1 cup granulated sugar
- 3 tablespoons cornstarch
- 1 teaspoon lemon zest
- 1 cup all-purpose flour
- 1/2 cup rolled oats
- 1/2 cup light brown sugar
- 1/2 cup unsalted butter (cold)
Instructions
- Preheat your oven to 375°F and lightly grease an 8-inch or 9-inch baking pan.
- In a mixing bowl, combine cherry pie filling, sugar, cornstarch, lemon zest, and vanilla extract until mixed well.
- Pour the cherry mixture into the prepared baking dish.
- In another bowl, mix flour, oats, brown sugar, cinnamon, and salt. Add cold butter and mix until crumbly.
- Sprinkle the crumble topping over the cherry filling evenly.
- Bake for 50-60 minutes until golden brown and bubbly.
- Let cool slightly before serving warm or cold.
- Prep Time: 15 minutes
- Cook Time: 60 minutes
- Category: Desserts
- Method: Baking
- Cuisine: American
Nutrition
- Serving Size: 1 slice (approx. 150g)
- Calories: 320
- Sugar: 24g
- Sodium: 180mg
- Fat: 15g
- Saturated Fat: 9g
- Unsaturated Fat: 5g
- Trans Fat: 0g
- Carbohydrates: 45g
- Fiber: 2g
- Protein: 3g
- Cholesterol: 30mg

Leave a Comment