
Mini cheesecakes are the perfect sweet treat for any occasion. These individual desserts combine a creamy cheesecake filling with a delightful cookie base, making them a hit at parties, family gatherings, or simply as a satisfying snack. Their versatility allows you to customize toppings to suit your taste, ensuring that every bite is a little piece of heaven.

Why You’ll Love This Recipe
- Easy to make: With straightforward steps and common ingredients, anyone can whip up these mini cheesecakes in no time.
- Customizable flavors: Whether you prefer fruity toppings or rich chocolate ganache, these mini cheesecakes can be tailored to your palate.
- Perfect portion sizes: These individual servings make them great for sharing or enjoying one at a time without overindulging.
- Great for occasions: Mini cheesecakes are ideal for celebrations like birthdays, holidays, and potlucks, impressing your guests with their presentation and taste.
- Make-ahead convenience: Prepare these desserts in advance, allowing the flavors to develop overnight for an even better taste.
Tools and Preparation
Before diving into the recipe, gather your tools to ensure you have everything ready for making these delicious mini cheesecakes.
Essential Tools and Equipment
- Muffin tray
- Cupcake liners
- Food processor (or plastic bag)
- Mixing bowls
- Electric mixer
- Measuring cups and spoons
Importance of Each Tool
- Muffin tray: Holds the cupcake liners securely while baking the mini cheesecakes.
- Food processor: Efficiently crushes the Maria biscuits into fine crumbs for the cookie base.
- Electric mixer: Helps achieve a smooth and creamy cheesecake batter without lumps.
Ingredients
For the Cookie Base
- 200 g Maria biscuits
- 175 g melted butter
For the Cheesecake Batter
- 800 g cream cheese, room temperature
- 8 g vanilla sugar
- 175 g granulated sugar
- 60 g cornstarch
- 4 eggs
Optional White Chocolate Ganache
- 50 ml unwhipped heavy cream
- 200 g white chocolate
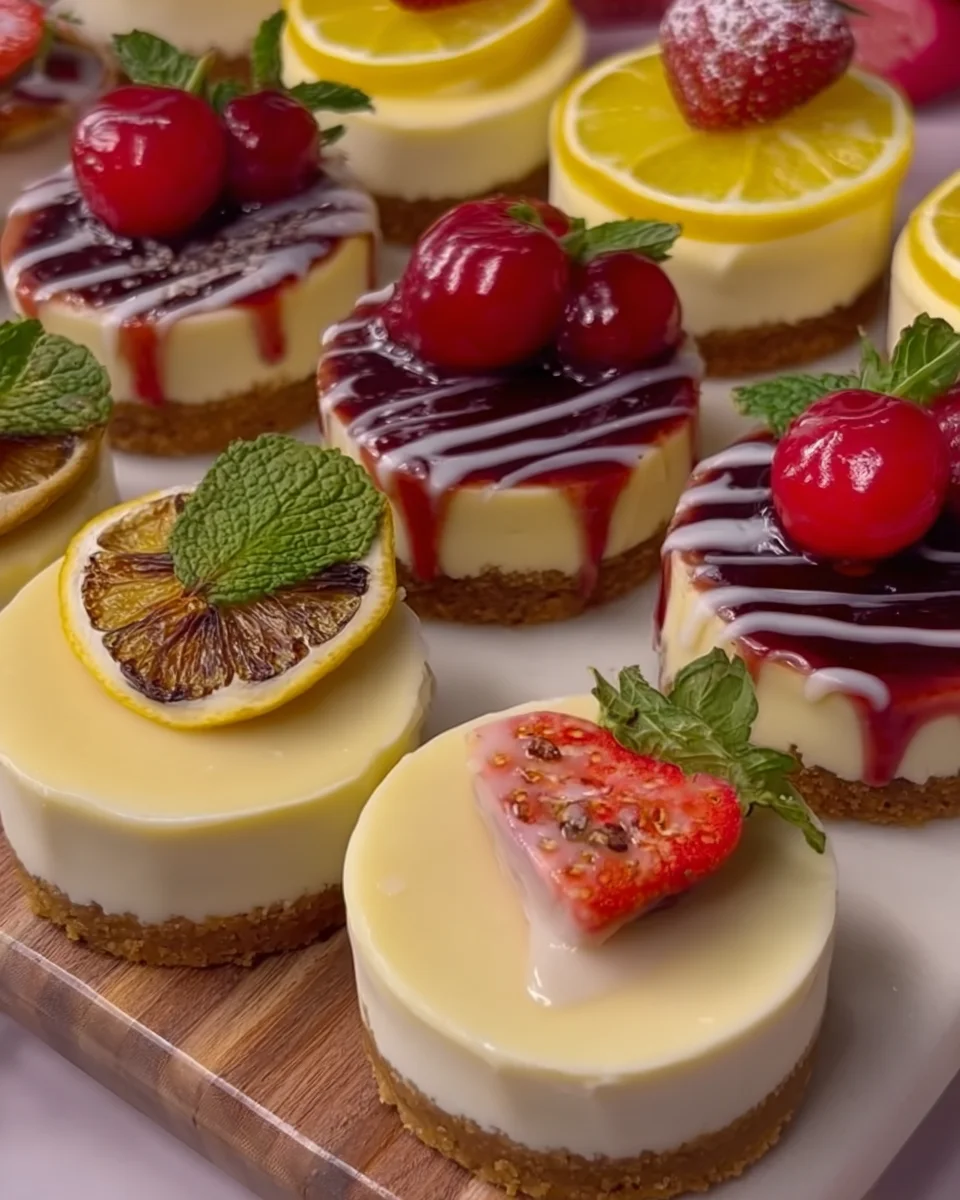
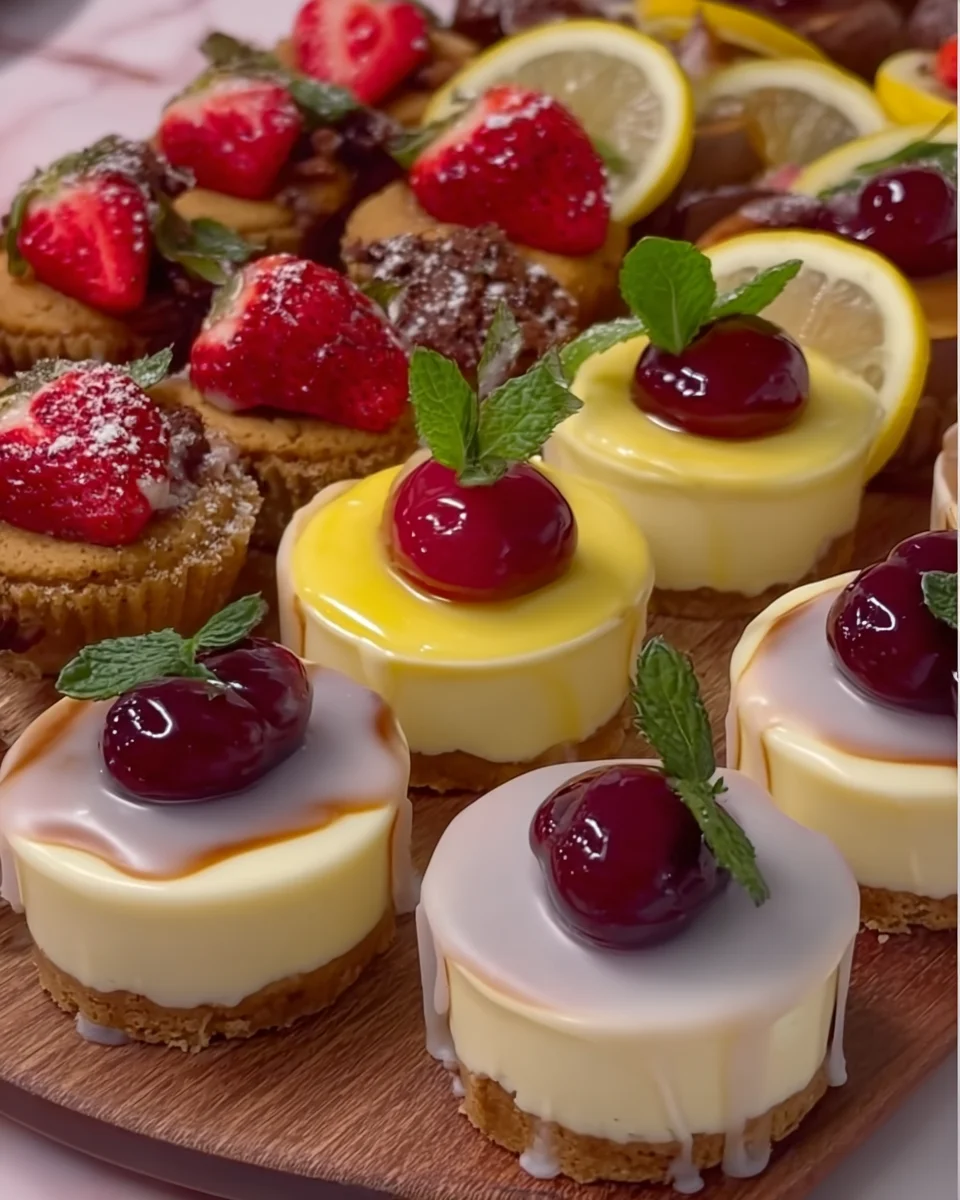
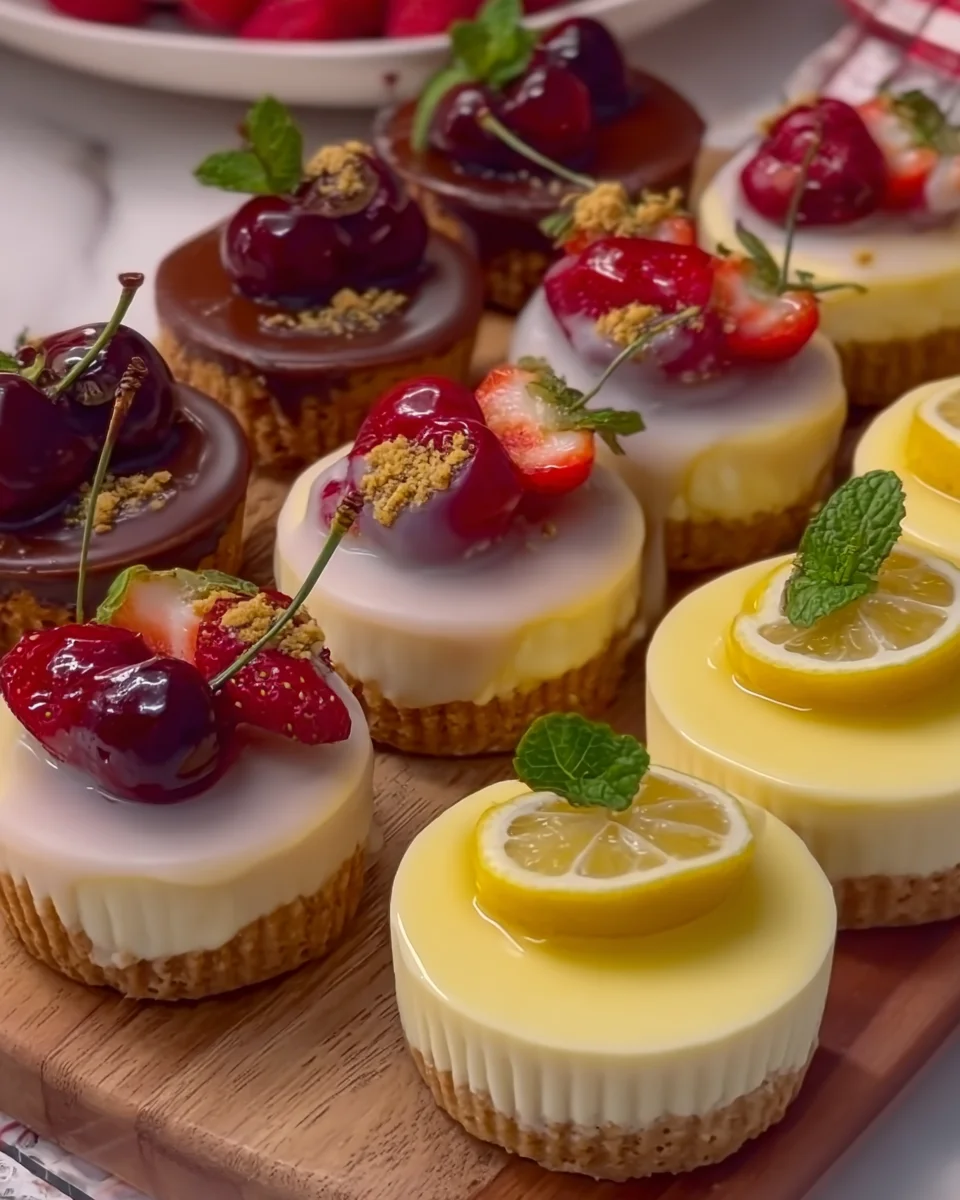
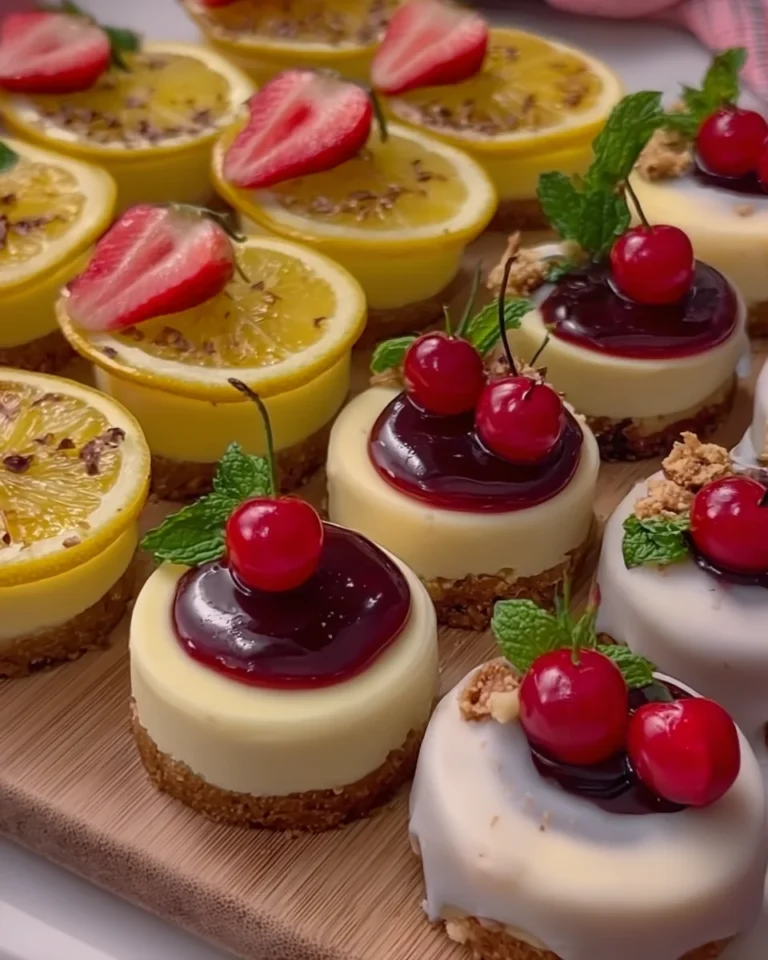
Toppings & Decoration Suggestions
Choose your favorites:
Speculoos (Biscoff)
– Warm 1–2 tablespoons of Biscoff spread to soften
– Drizzle or spread on top
Lemon Curd
– Add 1 spoon of lemon curd on top
– Decorate with a lemon slice or zest
Cherry Fruit Filling
– Add 1 spoon of cherry pie filling
– Add a whole cherry on top
Extras for decoration:
Fresh strawberries
Lemon slices
Speculoos cookies
Mint leaves
Raffaello candies
Decorate each cheesecake however you like to create a beautiful assorted platter!
💡 Tips:
Add more sugar if you prefer a sweeter cheesecake. They taste best the next day after chilling. Store in the refrigerator for 4–6 days. For maximum freshness, add toppings just before serving.
How to Make Mini cheesecakes (basisrecept)
Step 1: Prepare the Cookie Base
- Crush the Maria biscuits until very fine using a food processor or by placing them in a plastic bag and crushing them with a rolling pin.
- Mix in the melted butter, combining until the mixture resembles wet sand.
- Place cupcake liners into a muffin tray and divide the biscuit mixture evenly among them.
- Press down firmly using a spoon or the bottom of a glass to create a compact base.
- Refrigerate while you prepare the cheesecake batter.
Step 2: Make the Cheesecake Batter
- In a large bowl, beat the cream cheese until smooth and creamy using an electric mixer.
- Add in the vanilla sugar and granulated sugar, mixing well until combined.
- Stir in the cornstarch, mixing just until incorporated.
- Add eggs one at a time, mixing gently after each addition to avoid overmixing which could lead to cracks.
- Divide this cheesecake batter evenly over your chilled crusts in the muffin tray.
Step 3: Bake Your Mini Cheesecakes
- Preheat your oven to 160°C / 320°F.
- Bake for about 18–22 minutes; centers should remain slightly wobbly when done.
- Turn off your oven but let them cool inside with the door slightly ajar for around 10 minutes.
- Remove from oven, allowing them to cool completely on a wire rack before refrigerating for at least four hours or overnight.
Step 4: Prepare White Chocolate Ganache (Optional)
- Heat heavy cream until hot but not boiling.
- Pour it over chopped white chocolate, letting it sit for about one minute before stirring until smooth and glossy.
- Allow ganache to thicken slightly before piping it over cooled mini cheesecakes.
Step 5: Add Your Favorite Toppings
- Decorate each mini cheesecake as desired with options like Speculoos spread, lemon curd, cherry filling, fresh fruit, or other garnishes from above.
Enjoy your delightful mini cheesecakes!
How to Serve Mini cheesecakes (basisrecept)
Serving mini cheesecakes can be both fun and creative. These individual treats are perfect for parties, gatherings, or a delightful family dessert. Here are some serving ideas to make your mini cheesecakes shine.
Drizzled with Ganache
- Pour white chocolate ganache over the top for a glossy finish that adds richness and sweetness.
Fresh Fruit Topping
- Add fresh strawberries, raspberries, or blueberries on top for a burst of color and freshness.
Cookie Crumble Decoration
- Sprinkle crushed speculoos cookies on top to add texture and a hint of spice.
Lemon Zest Garnish
- Grate some lemon zest over the cheesecakes for a bright, citrusy flavor that complements the creaminess.
Mint Leaves Accent
- Place a mint leaf on each cheesecake for an elegant touch that also adds a refreshing taste.
Individual Dessert Cups
- Serve mini cheesecakes in small cups or jars for a charming presentation that’s easy to enjoy.
How to Perfect Mini cheesecakes (basisrecept)
To create the ultimate mini cheesecakes, consider these helpful tips. They will enhance your baking process and ensure delicious results every time.
- Use room temperature ingredients: Allow cream cheese and eggs to reach room temperature for easier mixing and a smoother batter.
- Avoid overmixing: Mix gently after adding eggs to prevent cracks in your mini cheesecakes during baking.
- Chill before serving: Refrigerate your mini cheesecakes for at least 4 hours or overnight to develop their full flavor and texture.
- Experiment with flavors: Try adding different extracts or flavored cream cheeses to change up the taste of your mini cheesecakes.
- Check doneness carefully: Bake until the centers are slightly wobbly; they will firm up as they cool down in the oven.
- Add toppings just before serving: For optimal freshness and presentation, add any toppings right before serving.
Best Side Dishes for Mini cheesecakes (basisrecept)
Mini cheesecakes pair wonderfully with various side dishes that complement their rich flavor. Here are some delicious options to consider.
- Fresh Fruit Salad: A mix of seasonal fruits adds brightness and balances the sweetness of the cheesecake.
- Chocolate Dipped Strawberries: These indulgent treats offer a delightful contrast to the cheesecake’s creamy texture.
- Coffee or Espresso: A warm cup enhances the flavors and provides a perfect ending to your dessert experience.
- Whipped Cream: Lightly sweetened whipped cream adds extra creaminess and can be flavored with vanilla or almond.
- Ice Cream Scoop: Vanilla or berry-flavored ice cream melts beautifully on warm mini cheesecakes, creating a decadent dessert.
- Cheese Platter: A selection of cheeses can provide savory balance against the sweetness of mini cheesecakes.
- Nut Mix: A simple mix of roasted nuts adds crunch and complements the rich flavors nicely.
- Herbal Tea: A calming herbal tea can cleanse the palate while finishing off your meal with elegance.
Common Mistakes to Avoid
Making mini cheesecakes can be simple, but it’s easy to make mistakes. Here are some common pitfalls and how to avoid them.
- Boldly overmixing: Overmixing your cheesecake batter can lead to cracks. Mix just until combined, especially after adding eggs.
- Ignoring temperature: Using cold ingredients can result in lumps. Always use room temperature cream cheese for a smooth batter.
- Skipping the chill: Not chilling the crust before adding the batter can cause it to crumble. Ensure you refrigerate the cookie base while preparing the batter.
- Incorrect baking time: Baking for too long dries out the cheesecakes. Look for a slightly wobbly center to know they’re done.
- Not letting them cool properly: Removing mini cheesecakes from the oven too quickly can cause cracks. Let them cool inside with the oven door ajar.
Storage & Reheating Instructions
Refrigerator Storage
- Store mini cheesecakes in an airtight container.
- Keep them refrigerated for up to 4–6 days.
- Layer parchment paper between each cheesecake if stacking.
Freezing Mini cheesecakes (basisrecept)
- Wrap each cheesecake individually in plastic wrap before placing them in a freezer-safe container.
- They can be frozen for up to 2 months.
- Thaw in the refrigerator before serving for best texture.
Reheating Mini cheesecakes (basisrecept)
- Oven: Preheat your oven to 160°C / 320°F and warm them for about 10 minutes.
- Microwave: Use low power and heat for about 15-20 seconds. Check frequently to avoid overheating.
- Stovetop: Place them in a pan with a lid on low heat, warming gently until just warmed through.
Frequently Asked Questions
What are mini cheesecakes (basisrecept)?
Mini cheesecakes (basisrecept) are individual-sized desserts that offer all the creamy goodness of traditional cheesecake in a compact form, perfect for parties or gatherings.
Can I customize my mini cheesecakes?
Absolutely! You can add various toppings such as fruit, chocolate ganache, or even flavored creams to tailor them to your taste.
How long do mini cheesecakes last?
When stored properly in the refrigerator, mini cheesecakes will last for about 4-6 days.
Can I make these mini cheesecakes ahead of time?
Yes! These mini cheesecakes taste even better after chilling overnight, making them ideal for preparation in advance.
What other flavors can I use for my mini cheesecakes?
You can experiment with flavors like chocolate, lemon, or pumpkin by adding extracts or purees into the batter.
Final Thoughts
These mini cheesecakes are not only delicious but also versatile. You can personalize them with different toppings and flavors to suit any occasion. Whether you’re hosting a party or enjoying a cozy night in, these sweet treats are sure to impress. Give this Mini Cheesecake (basisrecept) recipe a try today!
Mini Cheesecakes
Indulge in the delightful world of mini cheesecakes, where creamy goodness meets a buttery cookie crust in perfect harmony. These individual treats are not only easy to make but also customizable, allowing you to tailor them with your favorite toppings for any occasion. Whether it’s a birthday party, holiday celebration, or simply a sweet craving, these bite-sized desserts are sure to impress. With their perfect portion sizes and make-ahead convenience, you can enjoy these delectable cheesecakes without any hassle. Get ready to delight your taste buds with every creamy bite!
- Total Time: 55 minutes
- Yield: Makes approximately 12 mini cheesecakes 1x
Ingredients
- 200 g Maria biscuits
- 175 g melted butter
- 800 g cream cheese, room temperature
- 8 g vanilla sugar
- 175 g granulated sugar
- 60 g cornstarch
- 4 eggs
Instructions
- Prepare the cookie base by crushing Maria biscuits and mixing them with melted butter until it resembles wet sand. Press into cupcake liners in a muffin tray and refrigerate.
- In a large bowl, beat cream cheese until smooth, then add vanilla sugar and granulated sugar. Mix in cornstarch and eggs one at a time.
- Divide the cheesecake batter over the crusts and bake at 160°C / 320°F for 18–22 minutes, letting them cool inside the oven afterwards.
- Optionally, prepare white chocolate ganache by heating heavy cream and pouring it over chopped white chocolate until smooth.
- Decorate your mini cheesecakes with preferred toppings like fruit or ganache before serving.
- Prep Time: 30 minutes
- Cook Time: 25 minutes
- Category: Dessert
- Method: Baking
- Cuisine: General
Nutrition
- Serving Size: 1 cheesecake (60g)
- Calories: 260
- Sugar: 15g
- Sodium: 150mg
- Fat: 18g
- Saturated Fat: 10g
- Unsaturated Fat: 8g
- Trans Fat: 0g
- Carbohydrates: 24g
- Fiber: 1g
- Protein: 4g
- Cholesterol: 80mg

Leave a Comment