
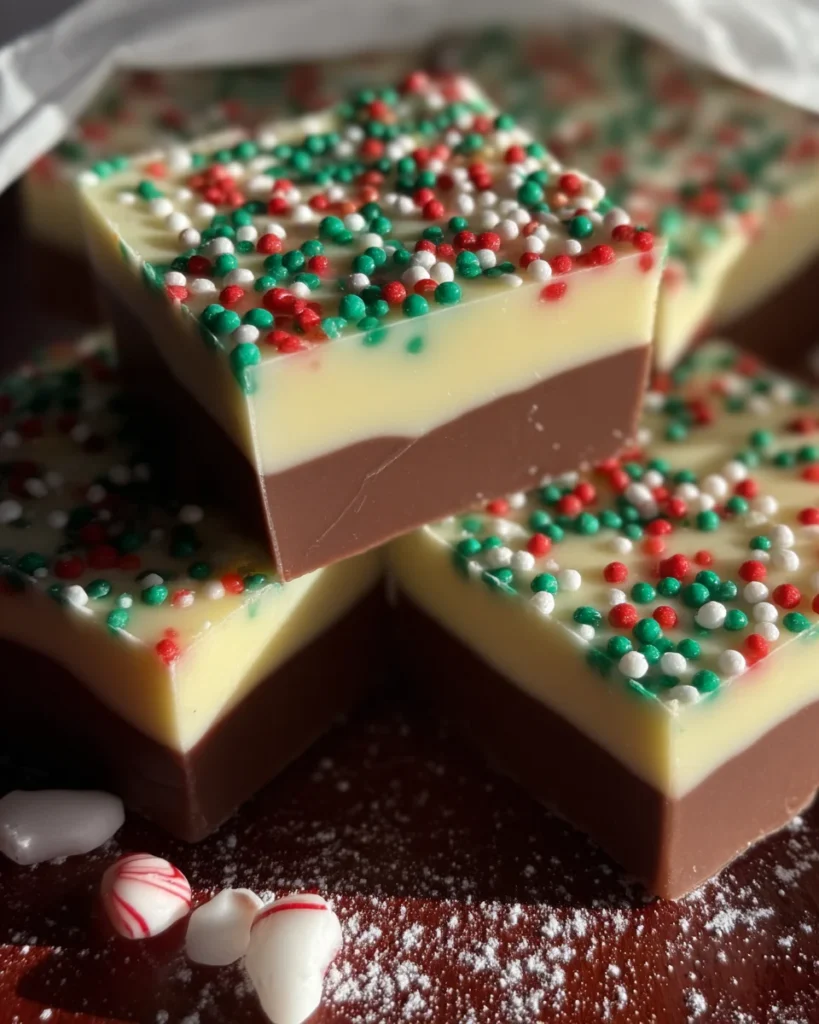
Delight in the festive spirit with Layered Christmas Fudge that’s perfect for holiday celebrations! This colorful treat features creamy layers of chocolate and vanilla fudge, making it an eye-catching dessert. Easy to prepare, this fudge is great for gift-giving or simply enjoying at home. The combination of flavors and textures creates a memorable sweet that stands out during the holiday season.
Why You’ll Love This Recipe
- Easy to Make: This recipe requires minimal cooking skills and only a few simple steps.
- Festive Appearance: The vibrant colors and sprinkles make it a visually appealing treat for holiday gatherings.
- Customizable Flavors: Change up the extracts or add nuts for a personal twist on this classic fudge.
- Perfect for Gifting: Package your fudge nicely to create thoughtful gifts for friends and family.
- No-Bake Delight: Enjoy a delicious dessert without the hassle of baking; just chill and serve!
Tools and Preparation
Before you start making your Layered Christmas Fudge, gather the necessary tools to ensure a smooth cooking process.
Essential Tools and Equipment
- Medium saucepan
- 8×8-inch pan
- Rubber spatula
- Mixing bowls
- Whisk or spoon
Importance of Each Tool
- Medium saucepan: Essential for melting chocolate evenly without burning it.
- Rubber spatula: Perfect for scraping down sides and ensuring no ingredients are wasted.
- Mixing bowls: Useful for separating different components of the fudge, especially when coloring.
Ingredients
To create your delicious Layered Christmas Fudge, you will need the following ingredients:
For the Chocolate Layer
- 2 cups semisweet chocolate chips
- 1 can (14 ounces) sweetened condensed milk
- 1 teaspoon vanilla extract
For the White Chocolate Layer
- 2 cups white chocolate chips
- 2 tablespoons unsalted butter
- 1 teaspoon peppermint extract (optional)
Additional Components
- Food coloring (red and green)
- ½ cup holiday sprinkles
How to Make Layered Christmas Fudge
Step 1: Prepare the Chocolate Layer
In a medium saucepan, combine the semisweet chocolate chips with 1 cup of sweetened condensed milk. Cook over low heat, stirring constantly until melted and smooth. Stir in the vanilla extract once fully melted.
Step 2: Layer the Chocolate Fudge
Pour the melted chocolate mixture into a greased 8×8-inch pan. Spread it evenly across the bottom. Place the pan in the refrigerator to set for about 30 minutes.
Step 3: Prepare the White Chocolate Layer
In another saucepan, combine white chocolate chips with the remaining sweetened condensed milk and butter. Cook over low heat while stirring until everything is melted and smooth. If you’re using peppermint extract, stir it in now for an extra flavor kick.
Step 4: Color the White Chocolate
Divide your white chocolate mixture into two bowls. Add a few drops of red food coloring to one bowl and green food coloring to the other. Mix until you achieve your desired colors.
Step 5: Layer the White Chocolate Fudge
Once your chocolate layer is set, alternately spoon dollops of red and green white chocolate fudge over it. Use a knife to gently swirl them together for a marbled effect. Finally, sprinkle holiday sprinkles on top for added festivity.
Step 6: Chill and Serve
Refrigerate your layered fudge for at least 2 hours or until fully set. Once set, remove from the pan and cut into squares. Enjoy your delightful festive treat!
How to Serve Layered Christmas Fudge
Layered Christmas Fudge is not only a delightful treat but also a versatile dessert that can be served in several festive ways. Here are some serving suggestions to make your fudge even more enjoyable during the holiday season.
Individual Treats
- Use small cupcake liners to hold individual squares of fudge. This adds a festive touch and makes it easy for guests to grab their own piece.
Gift Packaging
- Wrap pieces of fudge in clear cellophane bags tied with colorful ribbons. This makes for a charming homemade gift for friends and family during the holidays.
Dessert Platter
- Arrange the fudge on a large platter alongside other holiday treats like cookies and candies. This creates an inviting dessert table.
Hot Beverage Pairing
- Serve your fudge with hot cocoa or coffee. The rich flavors of the fudge complement warm beverages perfectly, enhancing the overall experience.
Holiday Parties
- Offer Layered Christmas Fudge as part of a dessert buffet at holiday parties. Guests will love having this sweet option among various sweets.
Kid-Friendly Presentation
- Cut the fudge into fun shapes using cookie cutters. Kids will enjoy these playful bites, making them perfect for family gatherings.
How to Perfect Layered Christmas Fudge
To ensure your Layered Christmas Fudge turns out perfectly every time, keep these tips in mind.
- Use quality chocolate: High-quality semisweet and white chocolate chips will melt better and result in a smoother texture.
- Avoid overheating: When melting chocolate, do so over low heat. Overheating can cause chocolate to seize, making it unusable.
- Cool layers properly: Allow each layer to set in the refrigerator for the recommended time before adding the next layer. This helps maintain clear separation between layers.
- Experiment with flavors: Feel free to mix in different extracts or spices, such as almond or cinnamon, for unique flavor variations.
- Use a sharp knife: When cutting the fudge into squares, use a sharp knife for clean edges. Wipe the knife between cuts for best results.
- Store correctly: Keep any leftover fudge in an airtight container at room temperature or refrigerate it to maintain freshness.

Best Side Dishes for Layered Christmas Fudge
While Layered Christmas Fudge is delicious on its own, pairing it with complementary side dishes can elevate your dessert experience. Here are some great options to consider.
- Peppermint Bark: A classic holiday treat made from layers of dark and white chocolate topped with crushed peppermint candies.
- Gingerbread Cookies: Soft and spiced cookies that bring warmth and nostalgia to your holiday spread.
- Sugar Cookies: These sweet cookies can be decorated with icing or sprinkles, adding color and creativity alongside your fudge.
- Chocolate-Covered Pretzels: Salty pretzels dipped in chocolate provide a delightful contrast to the sweetness of the fudge.
- Fruit Salad: A refreshing mix of seasonal fruits balances out rich desserts like Layered Christmas Fudge.
- Cheese Platter: Offering a selection of cheeses creates a savory option that pairs well with sweet treats like fudge, enhancing flavors across your spread.
Common Mistakes to Avoid
Layered Christmas Fudge can be a delightful treat, but there are common pitfalls to watch out for. Here are some mistakes to avoid:
- Overheating chocolate: When melting chocolate, keep the heat low and stir constantly. High temperatures can cause it to seize or become grainy.
- Not greasing the pan: Failing to grease the pan may result in sticking. Use cooking spray or parchment paper to ensure easy removal.
- Skipping the chilling time: Allowing the fudge layers to set properly is crucial. Skipping this step can lead to a messy presentation when cutting.
- Using low-quality ingredients: Quality matters in desserts. Choose good quality chocolate and fresh ingredients for the best flavor.
- Ignoring mixing techniques: When swirling colors, be gentle. Overmixing can lead to muddied colors instead of beautiful layers.
Refrigerator Storage
- item Store your Layered Christmas Fudge in an airtight container.
- item It will last up to 1 week in the refrigerator.
Freezing Layered Christmas Fudge
- item Wrap the fudge tightly in plastic wrap or aluminum foil before freezing.
- item The fudge can be frozen for up to 3 months.
Reheating Layered Christmas Fudge
- Oven: Preheat your oven to 350°F (175°C). Place fudge on a baking sheet for a few minutes until slightly warmed.
- Microwave: Heat in short bursts, around 10-15 seconds at a time, checking frequently to avoid overheating.
- Stovetop: Use a double boiler method over low heat, stirring gently until warmed through.
Frequently Asked Questions
What is Layered Christmas Fudge?
Layered Christmas Fudge is a festive dessert made with chocolate and white chocolate layers, often decorated with colorful sprinkles.
Can I customize my Layered Christmas Fudge?
Absolutely! You can add nuts, change food coloring, or incorporate different flavor extracts like almond or vanilla for variety.
How do I cut Layered Christmas Fudge?
Use a sharp knife and ensure the fudge is fully set before cutting into squares for clean edges.
Is Layered Christmas Fudge suitable for gift-giving?
Yes! It makes an excellent homemade gift during the holiday season when packaged nicely.
Final Thoughts
Layered Christmas Fudge is not just a treat; it’s a festive delight that brings joy during the holiday season. This recipe allows for plenty of customization, so feel free to experiment with flavors and decorations. Try making this sweet treat today and spread some holiday cheer!
Layered Christmas Fudge
Delight in the festive cheer with Layered Christmas Fudge, a colorful and creamy dessert that’s perfect for holiday gatherings. This no-bake treat features delicious layers of semisweet and white chocolate, beautifully swirled together and topped with vibrant sprinkles. Not only is it easy to prepare, but it also makes for thoughtful homemade gifts or a sweet addition to your dessert table. With its customizable flavors and eye-catching appearance, this fudge will surely impress your guests and create lasting memories during the holiday season.
- Total Time: 35 minutes
- Yield: Approximately 16 servings 1x
Ingredients
- 2 cups semisweet chocolate chips
- 1 can (14 ounces) sweetened condensed milk
- 2 cups white chocolate chips
- 2 tablespoons unsalted butter
- Food coloring (red and green)
- Holiday sprinkles
Instructions
- Prepare the chocolate layer by melting semisweet chocolate chips with half of the sweetened condensed milk in a saucepan over low heat until smooth. Stir in vanilla extract.
- Pour the melted mixture into a greased 8×8-inch pan and refrigerate for 30 minutes to set.
- For the white chocolate layer, melt white chocolate chips, remaining condensed milk, and butter over low heat until smooth. Optionally stir in peppermint extract.
- Divide the mixture into two bowls, adding red food coloring to one and green to another; mix well.
- Spoon alternating dollops of red and green mixtures over the set chocolate layer; gently swirl for a marbled effect. Top with holiday sprinkles.
- Chill for at least 2 hours until fully set before cutting into squares.
- Prep Time: 20 minutes
- Cook Time: 15 minutes
- Category: Dessert
- Method: No-Bake
- Cuisine: American
Nutrition
- Serving Size: 1 serving
- Calories: 175
- Sugar: 22g
- Sodium: 20mg
- Fat: 7g
- Saturated Fat: 4g
- Unsaturated Fat: 3g
- Trans Fat: 0g
- Carbohydrates: 26g
- Fiber: 0g
- Protein: 2g
- Cholesterol: 10mg
Leave a Comment